|
|
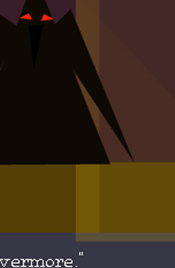 Picture
Book Project Picture
Book Project
- due to be posted as a Web album by Wednesday
3/3 at noon
Using Photoshop, create a picture book of at least 10, and not more than
25, pages telling a story with geometrical shapes (a la Molly Bang) and
words.
Rather than a story for children, consider "visualizing"
a song lyric, short story, poem, news report, or other narrative. The
story could be something published or something that happened to you,
etc. Take care, though, to pick an original text that tells (or can be
made to tell) a story—not all lyrics or poems do.
Produce each page (visual and text) as a separate Photoshop file, which
you'll evetually want to save (most likely) as a GIF after you're done
editing and revising it.
Because you're producing a "picture
book," the story should be told primarily with the images, and
any words you include should be supplemental. (In an "illustrated
book," on the other hand, the words carry the story or argument and
the pictures play just a supporting role.) Also make a cover for your
book.
Here are some principles to consider in creating your picture book (many
of these are explained more fully on pages 42-80 of Molly Bang's Picture
This).
- be sure you're telling a story with the images alone (though
it may not be the story you're able to tell when you add the
words).
- make the first and last pictures/pages of the book similar, to suggest
a full circle and a sense of a change
- take care that the turning of the pages follows natural breaks and
rhythms of the story
- use kinds of shapes (horizontal, vertical, diagonal) to evoke emotion,
tone, effect
- place objects high or low on a page for emotional effect, be aware
of how balance and weight can create or dissipate tension.
- choose the "framing" of the scene (in the middle, near the
edges) to direct attention, suggest or evoke emotion, create tension
- select background images and color (dark, light, warm, cool) for effect
- pay attention to the shape of object and characters (pointed vs. rounded/curves)
to suggest emotions attached to them
- use colors to suggest important associations in the story (we tend
mentally to connect by color rather than by shape)
- make contrasts to create tension or direct attention
size and frame objects and characters for intentional effects that help
the story and its mood
- be conscious of the visual vantage point used to see the scene and
how it suggests a relationship between the reader and the characters
- use space and arrangement to direct attention, suggest relationships,
set the mood and tone
- build verbal and visual symbolism in the story (objects and characters
that accumulate meaning through repetition) to suggest meaning, and
- use cultural coding (conventionalized symbols like the flag)
- make a cover that represents the story well, and that attracts the
intended audience
Submission Directions for the Picture Book
Project
A. Save the book cover design and the page images of your picture
book as the following file names into a new, empty folder called
"picturesource" in the folder "visual rhetoric" on
your Zip disk (not in the "www" folder). This folder
should contain nothing besides the pages of your picture book.
- Save the cover as "00.gif"
- Save the first page as "01.gif"
- Save the second page as "02.gif" etc.
B. Create a "Web Photo Gallery" of these images by following
the directions on Weinmann and Lourekas 392-394.
There are four areas of "Options" available in the second
box from the top of the "Web Photo Gallery" dialogue window.
Go through each and be sure to
C. Post the "picture" folder containing the Web Album
to your "www" folder (www/3220/picture) on the Web server using
Dreamweaver (Note: if you practice creating and posting a Web Album and
then modify your pictures, completely delete the old "picture"
folder on the server and replace it with the new one).
D. Send a message with the URL of your Web Album to the discussion
"Picture Book URLs." If you've followed my suggestions for naming
and placing files and folders, the URL should be
<http://www.d.umn.edu/~youruserid/3220/picture/>. Do
this by noon on Wednesday, 3/3
E. Print the page images out (a black-and-white printer is fine
since it saves money), making sure that each prints so that the longest
side is at least 6 inches (a 4 x 6, for example). You can put more
than one image on a page if you wish. Be sure your name appears on each
printed sheet. You might try using Photoshop's "Contact Sheet"
function (see page 388 of Weinmann and Lourekas) to create a printout
of more than one image per printed sheet. Be sure the page images are
big enough to read/see.
F. Annotate the printout, pointing out features of your work that
reflect your understanding and use of Molly Bang's principles.
G. Turn in the annotated printout to my mailbox (420 Humanities)
by noon on Wednesday, 3/3. See more on annotations
from the syllabus.
Resources for the Picture Book project
|
