BY TOM SKELTON
courtesy of
Dance Magazine
first published
June 1956
TOOLS OF LIGHTING DESIGN: THE DIMMERBOARD AND IMPROVISED EQUIPMENT
Last month we spent #265 for 4 Reflector Lamps, 2 Lekolites or Klieglites, and 6 Fresnels. By running cables from all of these lamps to a central point backstage, one person is able to control them all by switching them off or on. For subtle or dramatic lighting, however, a dimmerboard is essential and the next major allotment of money should go for its purchase. There are three types of dimmerboards O would recommend:
1) If you have a capable and willing electrician who will contribute his time and energy to the cause, you can buy individual 1000-watt auto-transformer dimmers (called Powerstats, Variacs, Variastats, etc.) one at a time for about #50 each. The electrician has to add the wiring, fusing and switches, and the dimmer should be mounted in a metal or wooden box so that the wiring is not exposed. Six of these dimmers, then, would control twelve 500-watt spotlights at a cost of $300, plus the materials used by the electrician. This is the least expensive way to get a dimmerboard since you can start with a few dimmers and gradually add as many as you need, but it ceases to be inexpensive if the electrician’s time is not contributed, since the wiring is very complex and time-consuming.
2) For a permanent dimmerboard with all the wiring completed, I would recommend one of the Add-A-Unit type switchboards. Various groupings of dimmers are available, but the most practical unit to acquire first would be a unit of six 1000-watt dimmers and one 6000 dimmer. The large dimmer can be used as a master for the smaller dimmers, or it can be used independently. Such a unit would cost from $1,200 to $1,300. A second unit of three 2,500-watt dimmers and one 6,000-watt dimmer, for the same price, would be a practical second unit to add. The advantage of this kind of dimmerboard is that you can keep adding units when the budget allows and be sure that each unit will work well with the units you already own.
3) For touring or if you want a board that is less expensive than the Add-A-Unit but has its wiring and switching complete, I would recommend the Davis Dimmer Switchboard which is the size of a suitcase and weighs about 75 pounds. The smaller board has a capacity of 6000 watts which can be apportioned over 6 dimmers as long as you don’t put more than 2,400 watts on any one dimmer, and lists at $640. There is also a 12,000-watt board with 6 dimmers that lists at $795. The Davis board does not have a master dimmer, like the Add-A-Unit type board, but otherwise it is equally practical and about half the price. Davis also manufactures a board for permanent installation.
An additional $200 will buy one more Lekolite or Klieglite and six more Fresnels to provide the “Basic 15 Spotlights” discussed in Part III of this series (Dec. 1955).
Improvised Equipment
Although professional equipment should be your objective, lack of it does not excuse bad lighting, for you can improvise spotlights from things around the house. Here are a few suggestions:
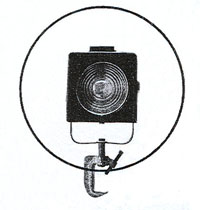
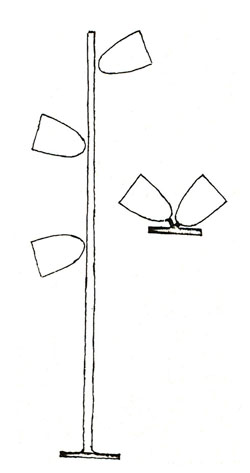
1) The Reflector Lamps mentioned in last month’s article, which can be mounted with a swivel socket in an ordinary bridge lamp.
Bridge lamp with a swivel socket and Reflector Lamp . . .
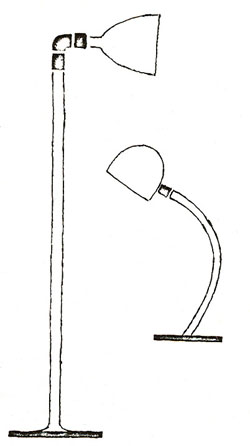
Ordinary goose-neck lamp with 200-watt bulb . . .
2) A goose-neck lamp with a 200-watt bulb. Try to get the kind of lamp that is on a telescope stand so that it can be above head height, but if it is not available you can always put the lamp on a chair or step ladder. Ordinary bulbs now come tinted a steel blue, a light pink, and a light amber, so you are spared the necessity of trying to scotch-tape a gelatine onto the lamp shade.
3) Then there are the modern lamps which many people have in their homes with cone-shaped shades. Some are already mounted on trees, others can be mounted on hat racks or the walls of the stage. Some have clip-on attachments and can be mounted almost anywhere.
4) Photographer’s clip-on or telescope-stand lights using photo flood bulbs (available in most drug stores for less than a dollar). These low wattage bulbs are extremely bright, but have a life of only 6 hours or so, and you must devise a way of getting gelatine in front of them.
5) If you’re really ambitious you can make home-made spotlights and floodlights out of stove pipes and pails and baking pans by mounting porcelain sockets in them. If you’ve talent as a tinsmith you can even make grooves for gelatine frames on the front of them. The significant things to remember are that you must provide ventilation holes so that the head of the bulb can escape, and that you can increase the efficiency a great deal by providing a good reflecting surface with white paint or aluminum foil.
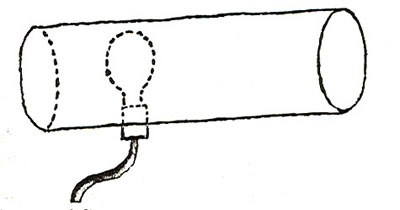
Start with an old pail and cut holes for porcelain socket and ventilation . . .
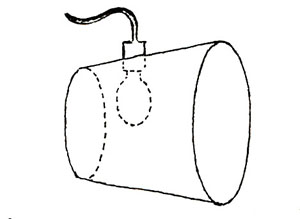
. . . or a stove pipe with the inside painted white . . .
Modern tree lamps or bed lamps with cone-shaped shades . . .

. . . or a wooden box lined with asbestos
6) Even flashlights with 3 batteries or more can produce some interesting effects as close-range followspots or special effects.
7) Well-shaded lights can be hung in view of the audience for certain ballets and become a scenic element as well as a functional source of light.
In other words, a little imagination and ingenuity can provide some not-too-bad lighting until you can afford professional equipment. But don’t make the common mistake of spending so much money improvising that you could have had a real spotlight for the same investment.
(to be continued next month)