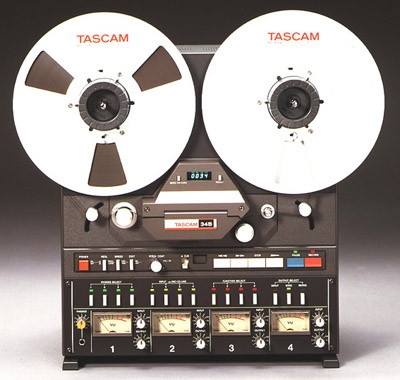
Reel-to Reel Tape Players/Recorders
TH 1551
Sound for the Theatre
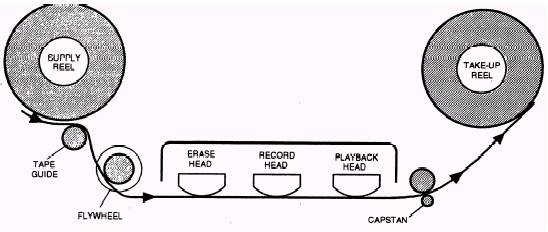
Playback Head
• Magnetic signal from tape creates voltage pattern inside head
• Electrical signal is amplified - phantom power
• (In cheaper units recording head and playback head double up)
Erase Head
•Signal is erased before recording is made
•All magnetized tape molecules are lined up uniformly
Head Placement - as tape travels
1. Erase head
2. Record head
3. Playback head

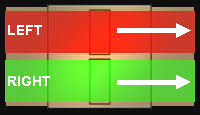
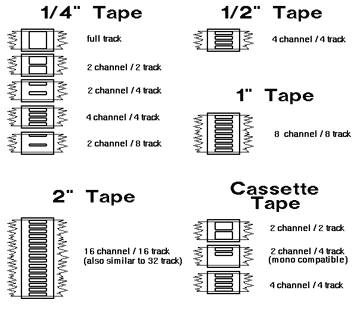
Tape Tracks and Channels
Half Track Stereo
Often referred to as the "broadcast standard" due to it's popularity in the broadcast industry. The format uses half of the tape to record each track, and thus its name. There are only two channels recording simultaneously in a single direction. There is no Side"B". Since the format uses the entire area of tape to record the two tracks, it offered the best sound quality. As tapes age, the audio is far less affected by oxide dropouts.

Quarter Track Stereo
Similar to half track stereo in that it records only two tracks simultaneously, this format uses a quarter of the tape for each track in order to record on both "sides" of the tape. The tracks in use are staggered, so Side "A" records on tracks 1 and 3. Flipping the tape over and playing the tape in the reverse direction (Side "B"), effectively doubles the amount of recording time for a single reel of tape by recording on tracks 2 and 4. More expensive machines incorporated an "auto reverse" function whereby the erase/record/playback heads were stepped down to align to the alternate tracks, thus negating the need to "flip the tape". This function was rarely used in the theatre because splicing the tape for Side "A" also meant altering the recording on Side "B".

Four Track
This layout allows four tracks to be recorded simultaneously, utilizing all of the tape in a single direction. There is no Side "B", which was no major loss because the theatre rarely used Side "B"anyway. The advantage of this layout was that four separate recordings could be made independently and played back quadrophonically in the theatre. This gave the theatre, in effect, its first opportunity for multi-track recording and playback.

SMPTE Time Codes
SMPTE time codes make it possible to coordinate audio with visual presentations - usually 35 mm slide shows or film projectors. To enable SMPTE time codes, tracks 1 and 2 were assigned to left and right channels of audio, and track 4 was assigned to the Time Code. Track three was used as a guard band to protect tracks 1 and 2 from crosstalk interference from the harsh distinctive time code sound on track 4. When the tape is played, a stereo signal is heard and the time code sent a signal to the slide projectors and/or film projectors to keep them in sinc.
Mechanical Requirements
Capstan
Exact movement of tape across heads to eliminate "wow"
Rewind - Supply Reel
High speed for convenience
Clutch operation during record/playback keeps tension on tape
Fast Forward -Take-up Reel
High speed for convenience
Clutch operation during record/playback
Counters
Reel revolution - common
Capstan revolution - more accurate
Electronic Requirements
Phantom power for better signal:noise ratio
Sync - recording level controls at mixer
Heads with flat frequency response - no signal loss
Tape Speeds
3 3/4 ips (inches per second)
7 1/2 ips
15 ips
Editing easier at higher speeds
Better high frequency response at higher speeds
Recording Terminology
Take: a recorded sound, usually in a series
Cut: Chosen piece of sound preceded by
leader tape (Program on DAT tapes)
Cue: Label stage manager assigns to a
particular action of the sound board operator
Track: Number of" lanes" of
recording provided by the record and playback heads
Channel: Number of "lanes" capable
of being recorded or playback simultaneously
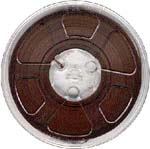
Reel Sizes
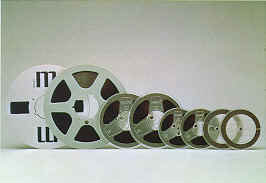
7 1/2" reel: 30 minutes at 7 1/2 IPS
10 1/2" reel: 60 minutes at 7 1/2 IPS
Reel-to-Reel Features
Zero Return
Digital Counter
Counter Reset Button
Tension Arm
Reel Size Switch
Tape Speed Switch
Edit Switch
Pitch Control
Cue Lever
Record Function Select
VU Meters
Meter Output Select - Input, Sync, Repro
Record/Play Pause Buttons
Shut Off Arm
Pinch Roller
Capstan Shaft
Step-by-Step Reel-to-Reel Editing Guide
Cassette Tape

Features
1/8" four track tape
thickness
60 minute tape = 1.5 mil
90 minute tape = 1.0 mil
120 minute tape = .5 mil
Eject Button
Zero Return
Counter Reset Button
Record/Play/Pause Buttons
Fast Forward/Rewind Buttons
Dolby Noise Reduction
Erasure Safeguards
Digital Audi Tape (DAT)
Features
Open/Close Button
Non-destructive editing
Start IDs/Auto IDs
ID Select Button
Write/Erase IDs
Position ID capability
Skip IDs
End IDs
ID Renumbering
Standby Mode
Record/Play/Pause Buttons
Record Mute
Search Buttons
Skip Program Buttons
RWD/FFWD Buttons
Counter Modes: Counter/ABS/PGM/Remain
Counter Reset Button
dB margin meter
Margin Reset