This exercise will give you practice coding Java in the matrix
application discussed in class. (See
Abstraction and Encapsulation
Lecture on menu to the left.)
This application makes use of the
abstraction and encapsulation features of Java.
This exercise will serve as the foundation for a later assignment on
encapsulation and unit testing.
To begin, download this zipped folder to an appropriate location on
your machine:
Matrix.zip.
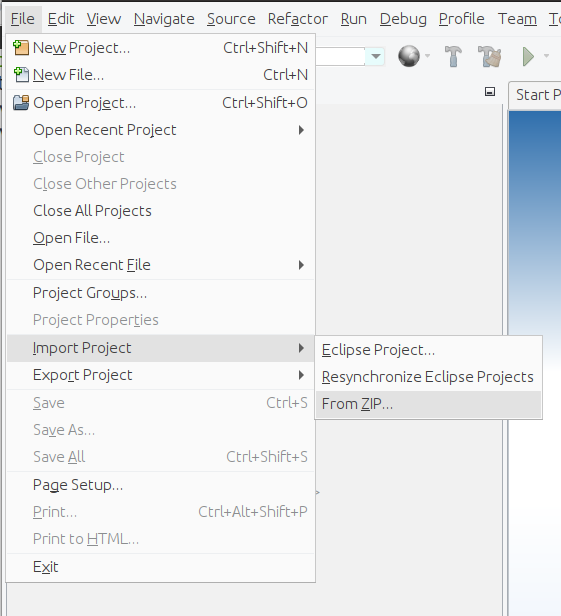
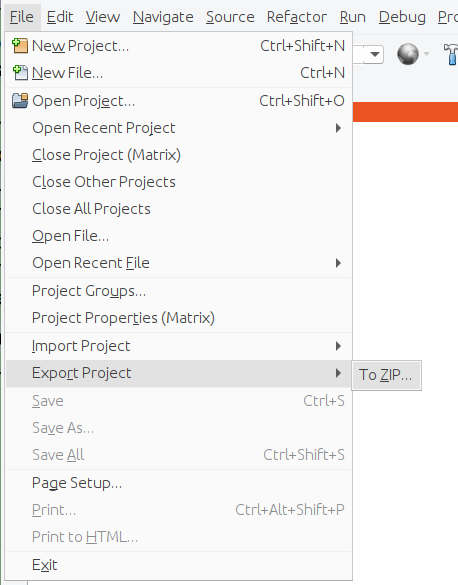
In NetBeans, click the
File menu in the upper left corner of the IDE and
select
Import Project > From ZIP...
In the
Import Project dialog, select
the
Matrix.zip file you just downloaded and an
appropriate location on your machine for the NetBeans
project. Click
Import.
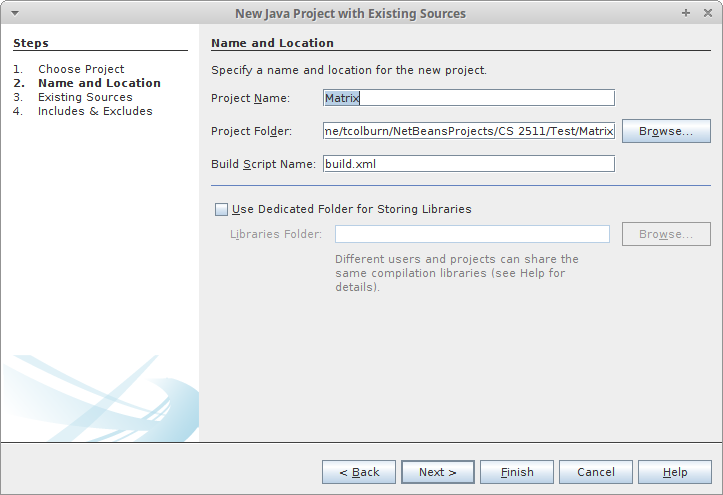
Name the project
Matrix and choose as location the
unzipped
Matrix folder. Click
Next.
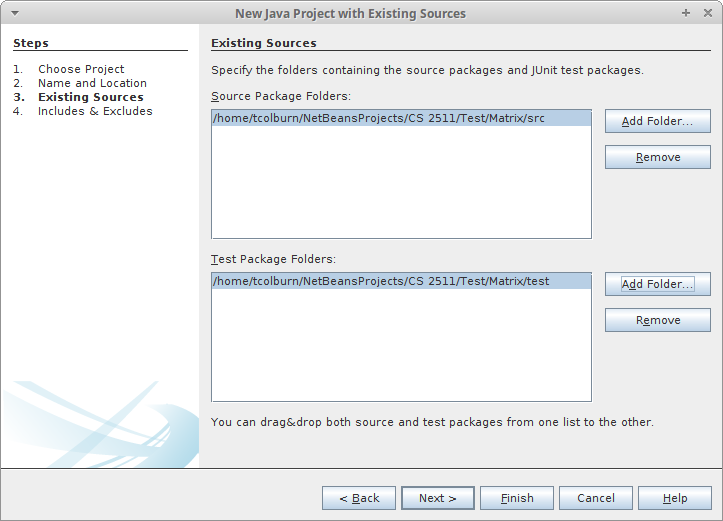
Specify the
src and
test sub-folders from
your
Matrix folder as the project's existing sources.
Click
Finish.
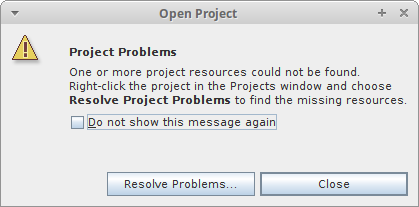
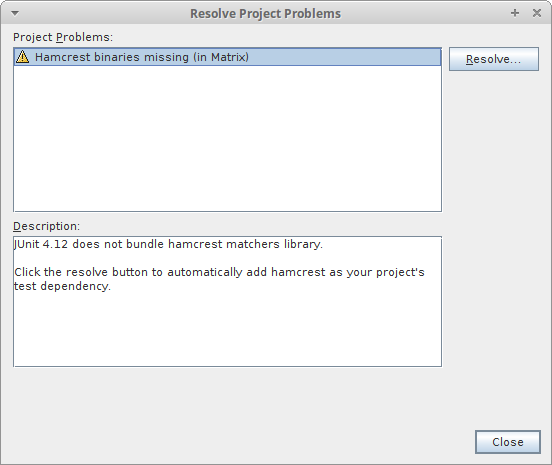
At this point you may get a warning like that below left. This has to
do with the dependencies among modules NetBeans requires to build and
run projects. Simply click
Resolve Problems...
then
Resolve... to add the dependency and click
Close.
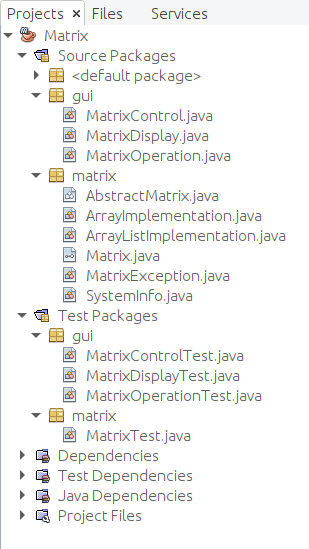
Open the handles on the
Matrix project in the
Projects
tab and open the associated subfolders. The structure must look like
this:
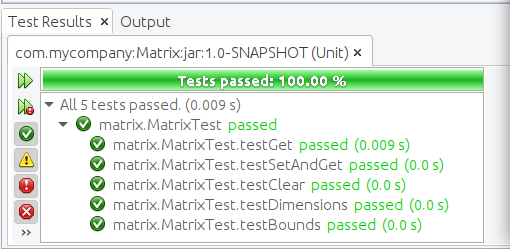
Right click the
MatrixTest.java node and choose
Test
File. Upon opening the
Test Results window you should see
the results below.
The
gui package in the source folder contains classes that
display matrix contents and allow the user to perform various actions
and operations.
Similarly, the
gui package in the test folder contains classes
that launch the matrix display windows.
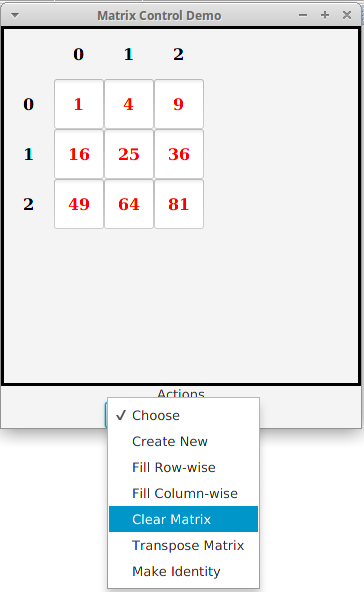
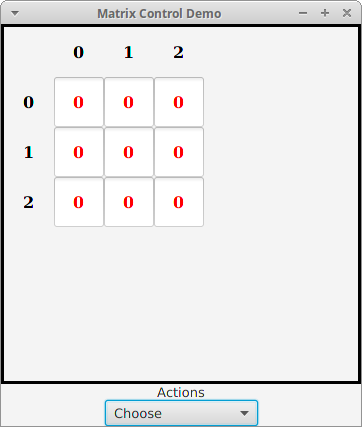
Right click the
MatrixControlTest class and choose
Test File
to display an empty 3×3
matrix. The display allows manual entry of elements. The image at the
lower left shows the matrix after the user has typed in some values and
clicked the
Actions choice box.
Most actions will be implemented by you in a later assignment, but
the
Clear action (which was given a default implementation in
the
Matrix interface) will work and produce the display at the
lower right.
The underlying data representation of matrices so far have been
two-dimensional, basic Java arrays of integers.
This implementation is complete and provided for you
in
ArrayImplementation.java.
Array implementations, though efficient, are not flexible. For example,
arrays are fixed size and cannot grow if required.
Because of the way that the matrix project has been designed, we have
the following advantages:
- It is straightforward to "swap out" the underlying array
representation for one based on Java lists,
i.e. ArrayListImplementation
- Only a simple change has to be made to the Matrix interface
- No changes have to be made to the AbstractMatrix
implementation of Matrix
- No changes need to be made in MatrixTest to test
the new implementation
This section will guide you through the new implementation.
First, change the definition of the static
create method in
the
Matrix interface from:
to:
Now test the
MatrixTest and
MatrixControlTest files
again. Since the
ArrayListImplementation class is incomplete,
neither will work.
Note the locations in
ArrayListImplementation.java where
comments indicate you must add code.
Note also the similarities between
ArrayImplementation
and
ArrayListImplementation:
- Both extend AbstractMatrix, which
implements Matrix.
- Both implement the get and set methods from
the Matrix interface.
The major difference is the underlying data representation, which
affects the constructor and methods.
To understand this implementation, you will need to be familiar with
Java's
List interface and
ArrayList class. Documentation
can be found in the
java.util package in the
Java 8 API Specification.
The major difference is the underlying data
representation:
- In ArrayImplementation the matrix elements are
represented using:
- In ArrayListImplementation it should be:
Note how the
ArrayImplementation constructor creates the
two-dimensional
elements array:
Similarly, the
ArrayListImplementation constructor must create a
list of lists and initialize all elements to zero. The top-level list
has size equal to the number of rows, and each element of this list has
a size equal to the number of columns. The top-level list should be
constructed with:
and a loop will need to similarly create internal lists.
The required methods
get and
set will
be similar.
Note
ArrayImplementation's use of
checkBounds
in
get and
set. Since
checkBounds is inherited
from
AbstractMatrix, it can be used in exactly the same way
in
ArrayListImplementation.
The only difference is how the elements are accessed in the
underlying data representation.
When you have completed the array list implementation of matrices,
test the
MatrixTest.java and
MatrixConsoleTest
files.
The results should be exactly as they were for the array
implementation.
The files required for the lab exercise are available from the menu on the
left. (Does not include the GUI files that will be discussed at another
time.)
Matrix.java
Note that
the
transpose,
makeIdentity,
fillRowWise,
and
fillColumnWise methods are not involved in this
lab exercise; they will be implemented in a later assignment.
AbstractMatrix.java
Note that
the
equals,
add,
and
multiply methods are not involved in this
lab exercise; they will be implemented in a later assignment.
When your matrix project is working correctly:
- Make sure your identifying information is in the class comments
of all class files
- click the File menu in the upper left corner of the IDE and
select Export Project > To ZIP....
 In the Export Project dialog, select a Build ZIP
location other than that of
the Matrix.zip file you originally downloaded (since the
exported file will also be called Matrix.zip). Click Export.
In the Export Project dialog, select a Build ZIP
location other than that of
the Matrix.zip file you originally downloaded (since the
exported file will also be called Matrix.zip). Click Export.
- Submit Martrix.zip to
.
Your project will be inspected and run by the lab instructor. Grading criteria:
- Successful running of MatrixTest
and MatrixControlTest using an array implementation: 2 points
- Successful running of MatrixTest
and MatrixControlTest using an array list implementation: 8
points
Note the general
Submission Policy in the menu at left.