Besides providing a platform for Java development,
NetBeans is also written in Java. So before installing NetBeans
you must first
install the Java Development Kit (JDK) on your computer.
The Java language is developed by
Oracle Corporation,
which is also well known for its database management software.
Oracle makes the JDK available for free for personal use, but
you must create an Oracle account (which does not generate a lot
of email).
Here is a link to
the
Oracle Java Download Page (opens
in a separate window).
- At the time of this writing, the latest release is Java
17. However, it does not work well with NetBeans, so scroll
down the page and select Java 11 (currently
release 11.0.13).
- Find and click on the download package for your
platform. For example, the one for Linux
is jdk-11.0.13_linux-x64_bin.tar.gz.
- Before downloading you will be asked to create an
Oracle account or to sign in if you already have one. It
will be a good idea to remember your login credentials,
since you will likely want to download future Java
releases.
- Download the package to a
directory (folder) on your machine where you would like the
JDK to live.
- Just below the download area you will find a link to
Installation Instructions for you to
follow. Basically, you will extract the compressed download
package into a directory (in this case jdk-11.0.13)
that will be your Java Home.
NetBeans is developed by the open source
Apache Software
Foundation, which is also well known for creating the most
widely used web servers in the world.
Here is a link to
the
Apache NetBeans Download Page (opens
in a separate window).
When you have successfully installed NetBeans, the desktop
launch icon will look like:
We will use NetBeans version 8.2. There are more recent versions
of NetBeans, but they are not yet integrated well with JavaFX
(the Java graphical user interface framework) that we will use.
NetBeans is written in Java, so we must also install the Java
Development Kit (JDK). The only JDK that works well with
NetBeans 8.2 is JDK version 8 from Oracle Corporation.
Happily, Oracle provides both JDK 8 (more specifically, JDK
8u111) and NetBeans 8.2 in a download
"cobundle"
AVAILABLE HERE (opens in a new
window).
Download the cobundle for your system and follow the
INSTALLATION INSTRUCTIONS
(opens in a new window).
Upon completion, the NetBeans desktop launch icon will look like
this:

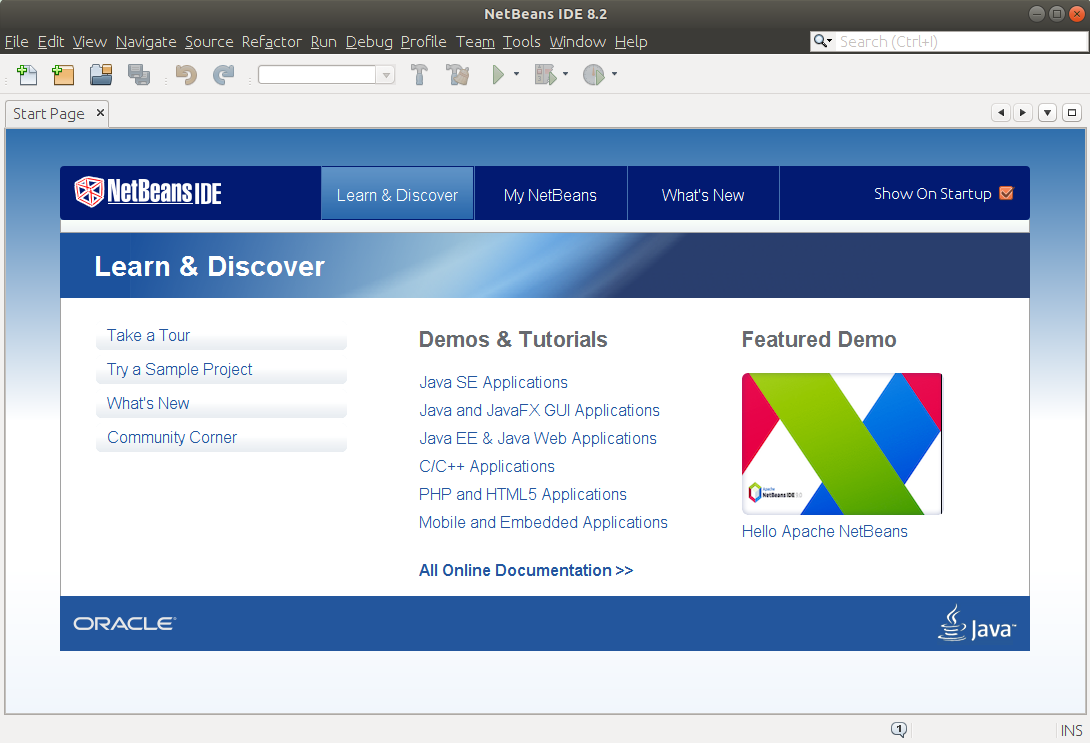
Upon launch, the IDE's start screen will look like this:
You will need to:
- Accept the license agreement for Java SE Development Kit 8u221
- Download the package appropriate for your platform
- Follow the provided
installation instructions (also rendered
below) that are given for different platforms
Go to this link (also rendered below):
https://netbeans.org/downloads/old/8.2/.
Then:
- Select your platform (Windows, Linux, or MacOS)
- Click Download under the column labeled "Java SE" under
"NetBeans IDE Download Bundles" and locate the download
bundle in the same folder in which you installed the JDK.
Upon download, follow the installation instructions given here (also
rendered below):
https://netbeans.org/community/releases/82/install.html.
Note:
- The installer will locate your JDK installation and display it
before installation. Be sure that JDK 8 is selected.
-
Upon completion, the NetBeans desktop launch icon will look like
this:
You can also launch NetBeans from the command line by running the
executable appropriate for your platform located in the bin
folder in your NetBeans installation folder.
Upon launch, the IDE's start screen will look like this:
NetBeans is developed and maintained by the
Apache Software Foundation.
To install it, go to the
Apache NetBeans
Project and click
Download.
Click the "
incubating-netbeans-10.0-bin.zip" link, which will
bring you to a page suggesting a mirror site for your download.
Click the mirror site to download
incubating-netbeans-10.0-bin.zip to your machine, then unzip
(extract) the folder (called
netbeans) to a location of your
choosing.
Within the
netbeans folder is a subfolder called
bin that
contains these files:
- netbeans: a shell script for running under Linux and
MacOS
- netbeans64.exe and netbeans.exe: executable
binaries for Windows
Run the binary appropriate for your system. After launch, the IDE should
look like this:
In this step you will create, build, and run a NetBeans project using
the provided files
Console.java and
ConsoleTest.java.
Don't worry if you don't understand the code at this time.
The files required for this exercise are available from the menu on the
left.
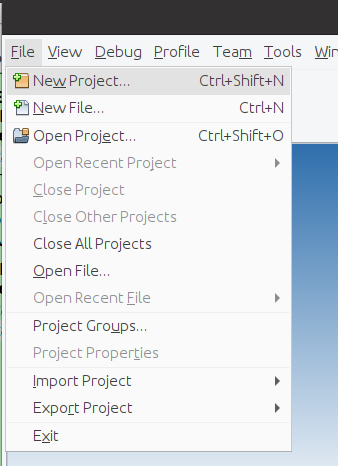
First, start NetBeans on your machine. Then follow the menu to the left.
Click the
File menu and select
New Project...
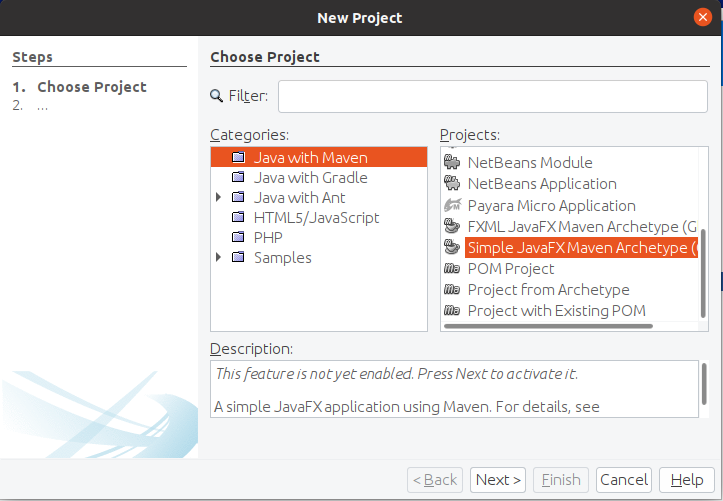
In the
New Project dialog, under
Categories: select
JavaFX and
under
Projects: select
JavaFX
Application.
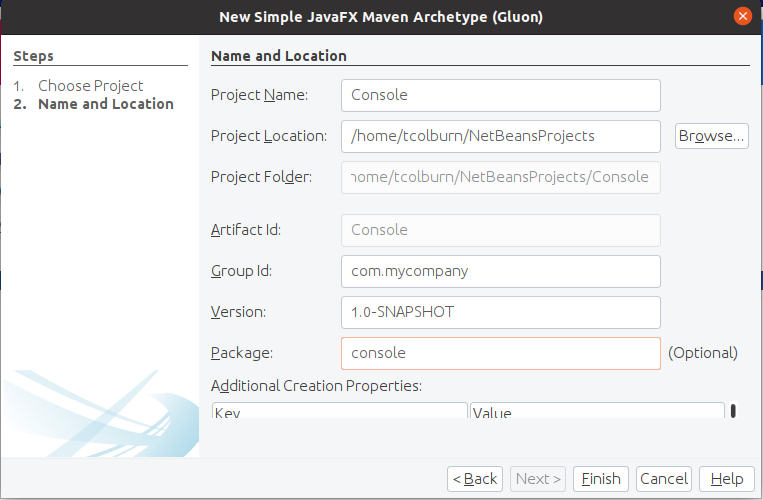
In the
New JavaFX Application dialog, name the
project
Console and choose an appropriate project location
on your machine. Leave the
Create Application Class box checked
and click
Finish.
You should now see the
Console project under the
Projects
tab in the upper left of the IDE. A source package
called
console will have been created with a class file
called
Console.java:
Click the handle next to the
Console project node to reveal
the
Source Packages and
Libraries sub-nodes.
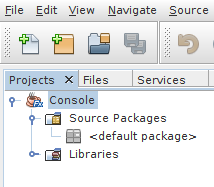
By default, there is a source package with no name. We will create a
new package called
console.
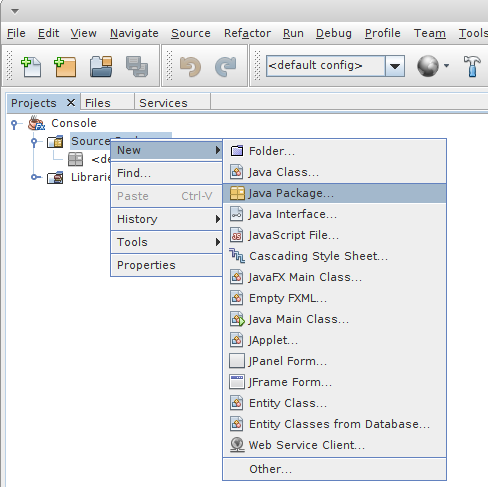
Right click the
Source Packages node and
choose the
New ▸ Java Package... option.
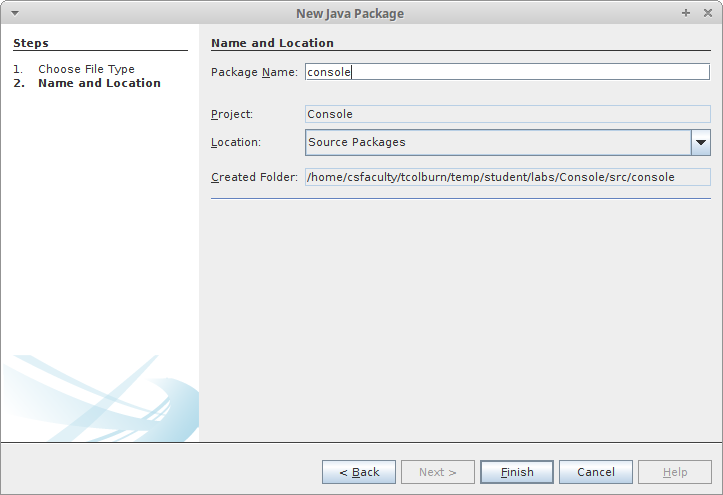
In the
New Java Package dialog, name the
package
console and click
Finish.
You should now see the
console package under the
Source
Packages node.
In this step you will
update the default Console class in the console package.
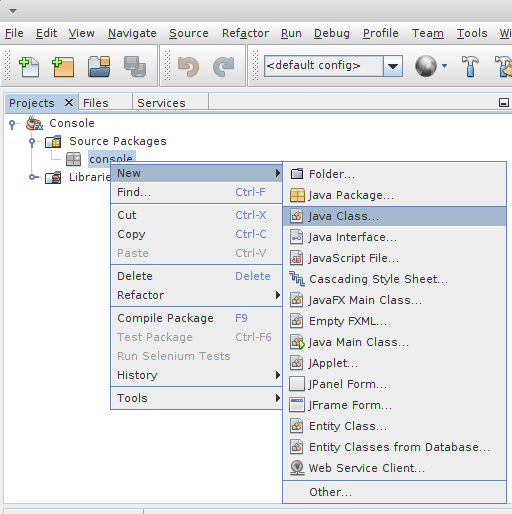
Right click the
console node and
choose the
New ▸ Java
Class... option
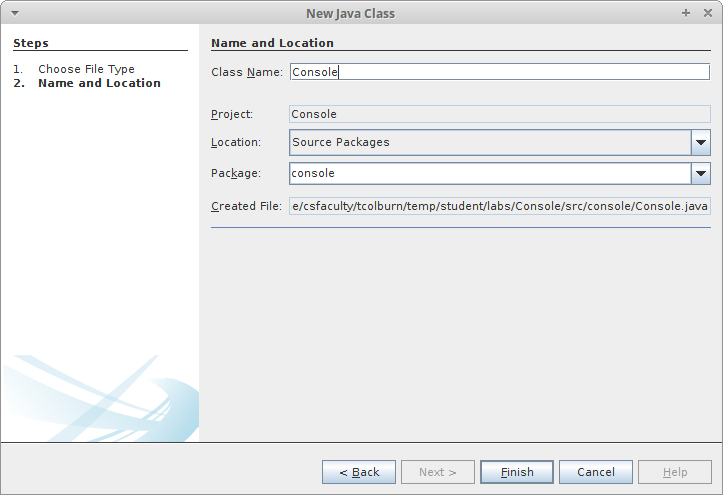
In the
New Java Class dialog, name the
class
Console and click
Finish.
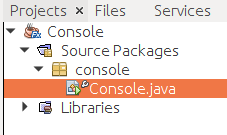
You should see the
Console.java class under
the
console node:

You could actually run this class by right-clicking it and
choosing
Run File. You will get a simple GUI (graphical user
interface) version of a "Hello World" application.
However, we are going to replace the contents of
Console.java
with our own code. Double click the class to open it in the
source editor.
You should see the default contents of
the
Console.java file under the
Console.java tab in
the right side of the IDE. This is a full program and text editor
with cut-and-paste capabilities.
Replace the default contents of
Console.java with this
provided
Console.java
file using your desktop environment's cut-and-paste capabilities.
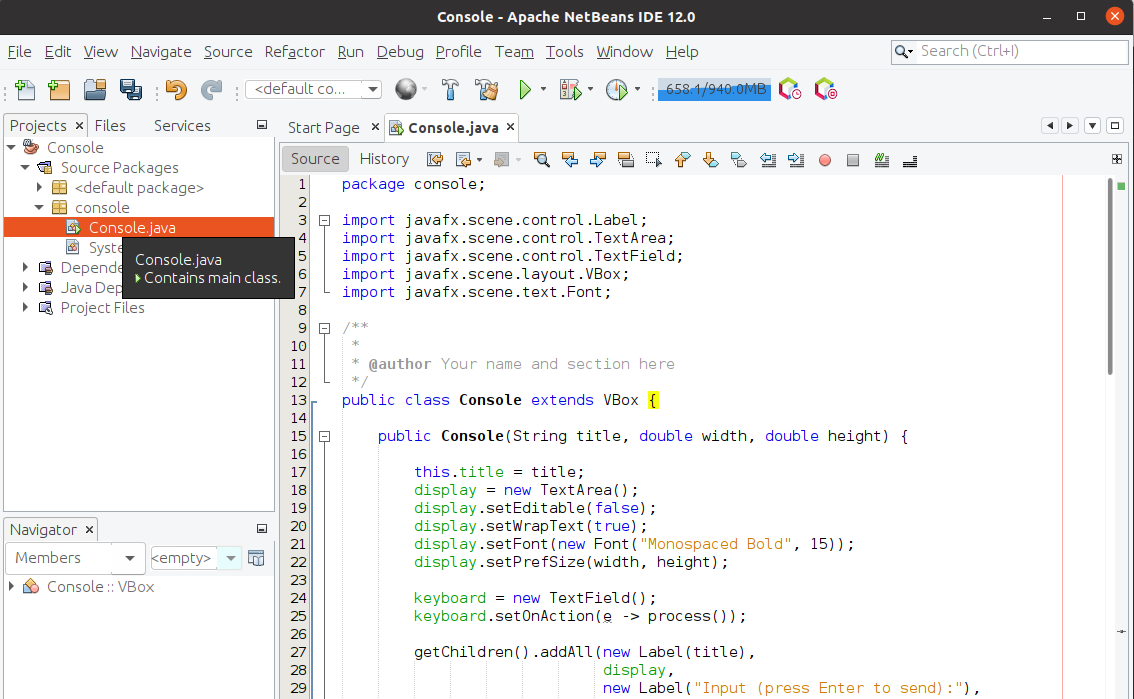
Note the small wrench icon next to
Console.java. This indicates
that the file has not been compiled.
While compilation usually takes
place automatically when you run a project or file, you can also
compile files manually.
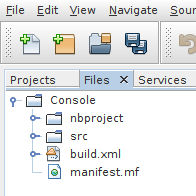
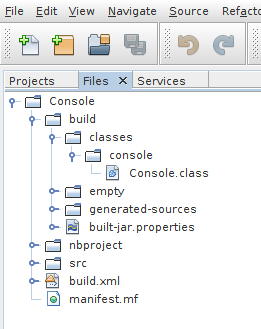
Click the
Files tab next to the
Projects tab in
the upper left of the IDE and open the files view.
Note the absence of a
build folder (not the same as
the
build.xml file).
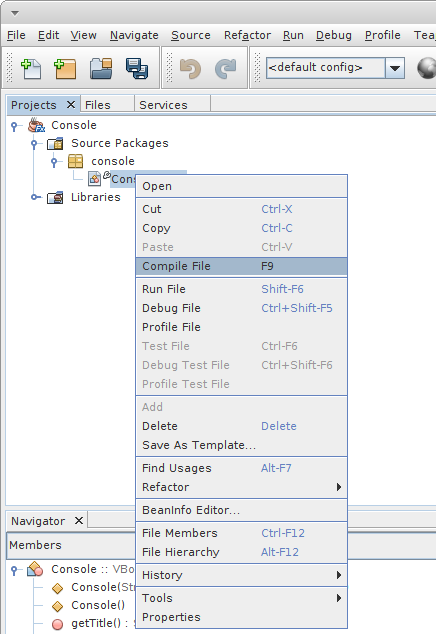
Return to the
Projects tab, right click
the
Console.java node, and select
Compile File.
Note that the wrench icon disappears and a
build folder
has been added to the
Files tab.
Navigate through the
build folder and sub-folders to find
the
Console.class object file produced by the compiler.
So far you have created a
Console class and successfully
compiled it.
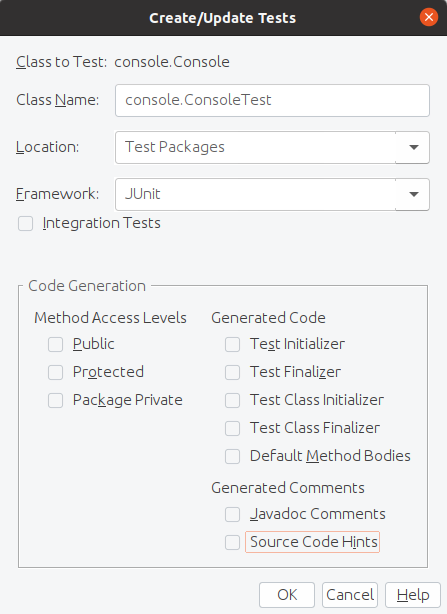
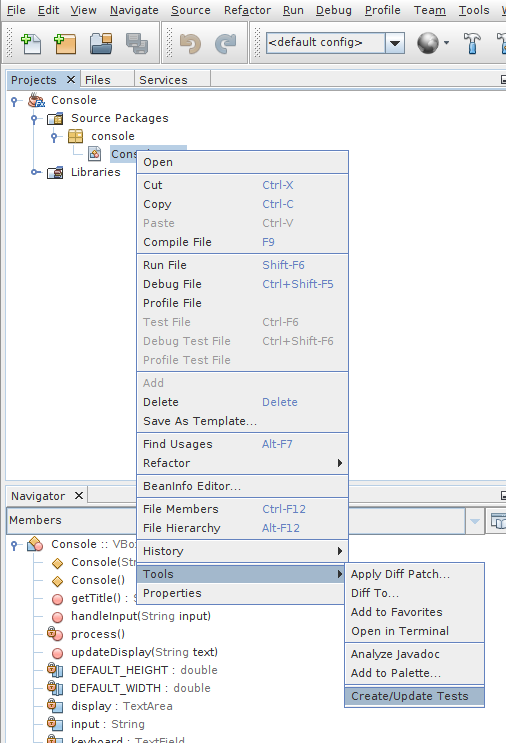
To test the class we will use the
JUnit framework included with
NetBeans.
In the
Create/Update Tests dialog, keep the name and
location defaults but uncheck all the code generation
options. Click
OK.
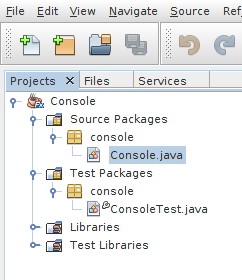
Note that the
Test Packages node has been added to
the
Projects tab, with package name
console and
class name
ConsoleTest.java
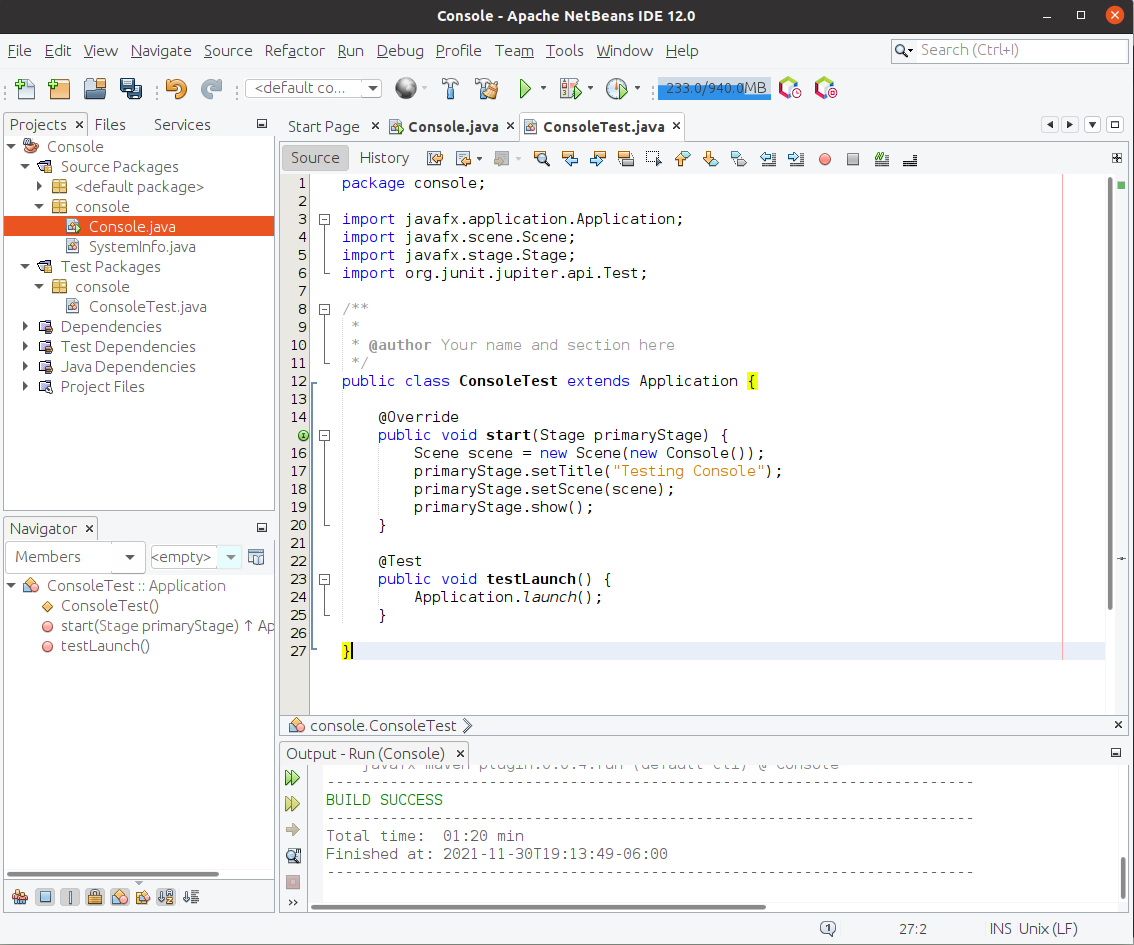
You should also see the default contents of
the
ConsoleTest.java file under the
ConsoleTest.java tab in
the right side of the IDE.
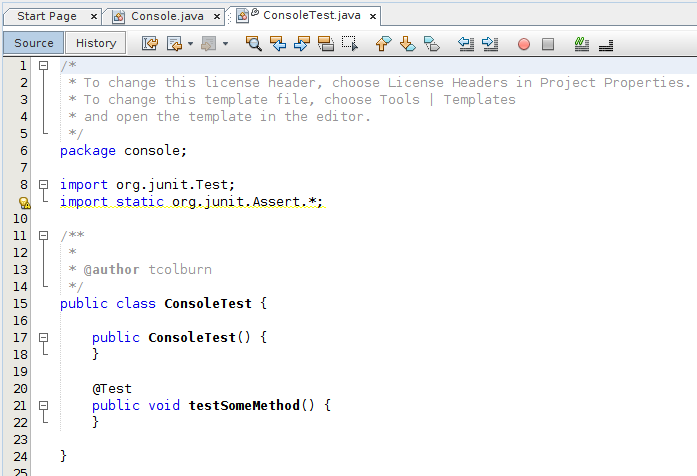
Replace the default contents of
ConsoleTest.java with this
provided
ConsoleTest.java file.
Note the small wrench icon next to ConsoleTest.java. Although
you can manually compile the file, it will be automatically compiled
when it is run.
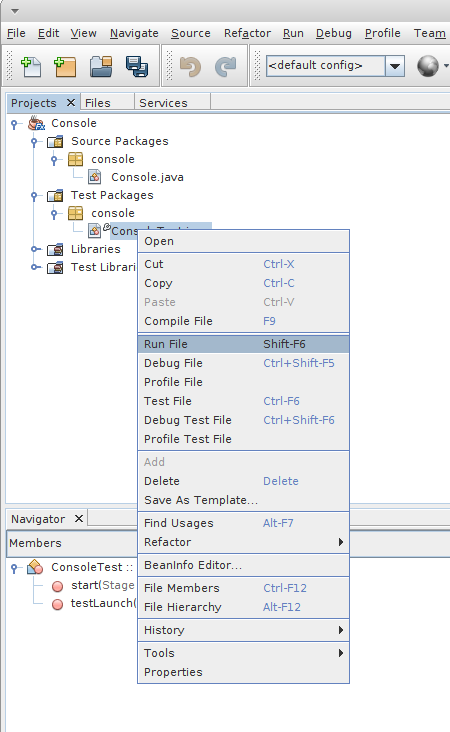
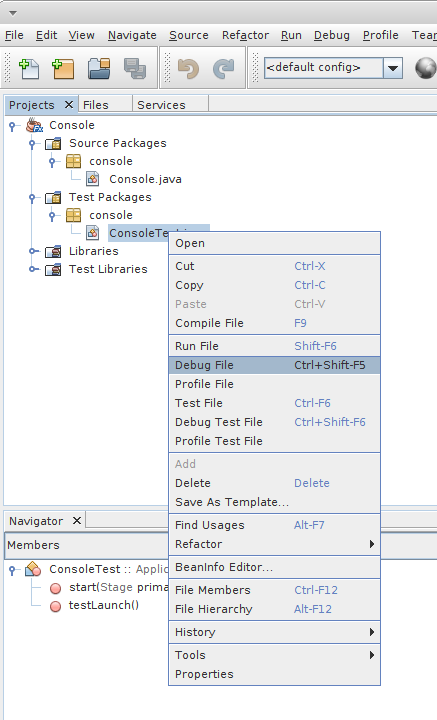
Right click the
ConsoleTest.java node and choose
Run
File.
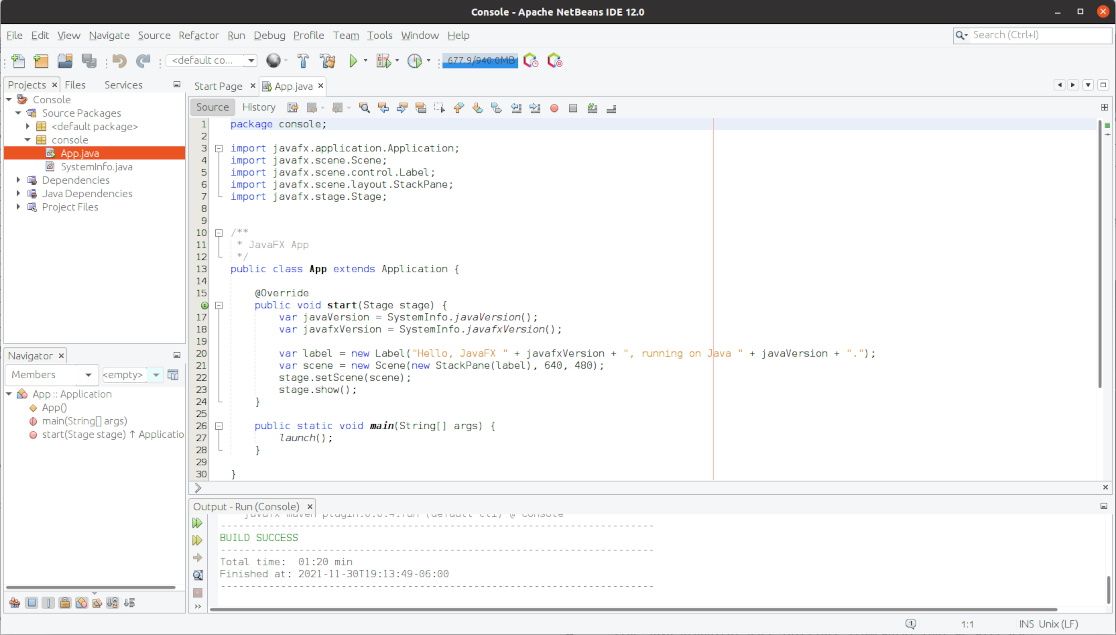
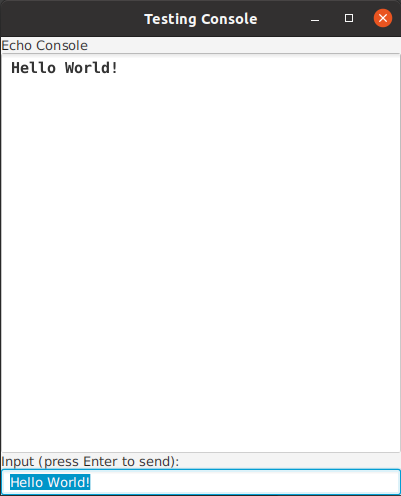
A window with the title
Testing Console should appear. It
simulates a terminal console that takes single-line commands and
processes them when
Enter is pressed on the keyboard.
Click in the
Input area, type some text, and press
Enter. The input will be echoed in the upper part of the window
and the console will wait for and display more input until the application is
ended by clicking the ⨯ in the upper right corner.
NetBeans provides a useful means of debugging Java programs by
allowing the stopping of program execution to inspect the
program's state, for example, the values of an object's instance
fields.
A
breakpoint is a program location at which you would like
program execution to pause so you can inspect its state.
When a class file is open in the NetBeans source editor, line numbers are
displayed (although they are not part of the program itself).
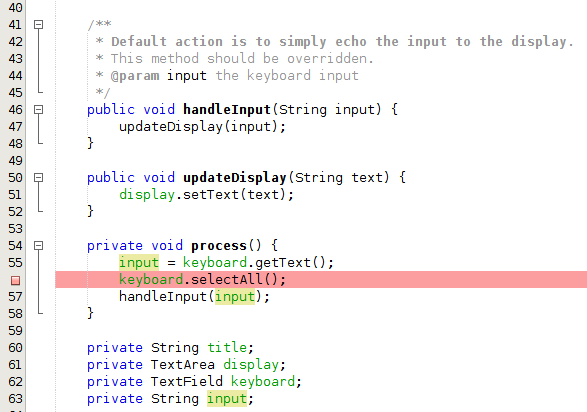
For example, line number 56 in
Console.java immediately follows
the assignment of the variable
input. To observe the value of
this variable while the program runs, set a breakpoint by clicking on
line number 56:
To run a test with breakpoints observed, right click
the
ConsoleTest.java node and choose
Debug File.
The console will appear and wait for input, for example,
"Hello". When
Enter is pressed the
process method is
called and execution pauses at line 56.
Notice that a
Debugging tab is displayed in the upper
left of the IDE. Also, you can hover the mouse over variable
references in the program to observe their values. Below, the mouse
is passing over the declaration of the instance field "
input":

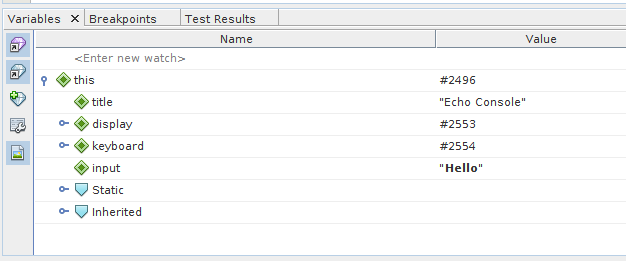
When the debugger is being run, a
Variables window appears
beneath the source editor, showing the names and values of all exposed
variables.
In the
Variables window below, the
this variable has been
opened to show the
input variable and its current value, "Hello".
When a program is being debugged, the programmer has a choice between
high-level controls and stepping controls when deciding how to proceed.
High-level debugging controls involve exiting or proceeding to
breakpoints.
The following high-level controls
(
Finish, Pause and
Continue) appear on the tool bar:

Stepping controls allow the program to pause, not based on breakpoints,
but on the program's structure in terms of source lines and expressions.
The following stepping controls
(
Step Over, Step Over Expression, Step Into and
Step Out)
appear on the tool bar:

- Step Over
 : Executes one
source line, including any
contained method calls (steps "over" a source line)
: Executes one
source line, including any
contained method calls (steps "over" a source line)
- Step Over Expression
 : Executes one method
call in an
expression (steps "over" a method call, among possibly others, in
an expression)
: Executes one method
call in an
expression (steps "over" a method call, among possibly others, in
an expression)
- Step Into
 : Executes one
method call in a source line
(steps "into" a source line and executes a method call, among
possibly others on that line)
: Executes one
method call in a source line
(steps "into" a source line and executes a method call, among
possibly others on that line)
- Step Out
 : Executes one
source line and any remaining
lines if the source line is part of a method body (steps "out" of
a method body)
: Executes one
source line and any remaining
lines if the source line is part of a method body (steps "out" of
a method body)
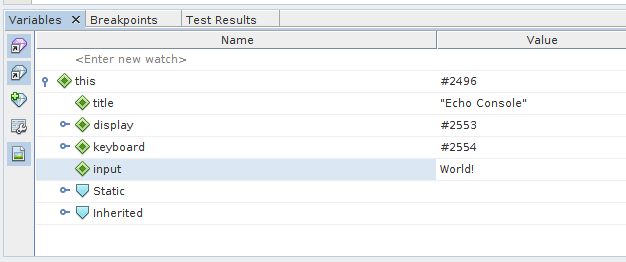
Besides inspecting variable values while debugging, you can change
their values to further observe program behavior.
Below on the left the value of
input has been manually changed
in the debugger to "World!". After continuing through the next
breakpoint the console looks like that on the right. Note that the new
value of
input is displayed though that value was not entered by
the program user.
When your console project is working correctly:
- Make sure your identifying information is in the class comments
of Console.java and ConsoleTest.java
- Use File > Export Project > To Zip... to zip (compress)
your Console folder as
Console.zip.
- Submit Console.zip by going to the module called
Lab 1: Installing and Using NetBeans in
Your project will be inspected and run by the lab instructor. Grading criteria:
- Successful creation of the Echo Console: 10 points
 exits
the program
exits
the program  pauses the
program if it is not already
at a breakpoint
pauses the
program if it is not already
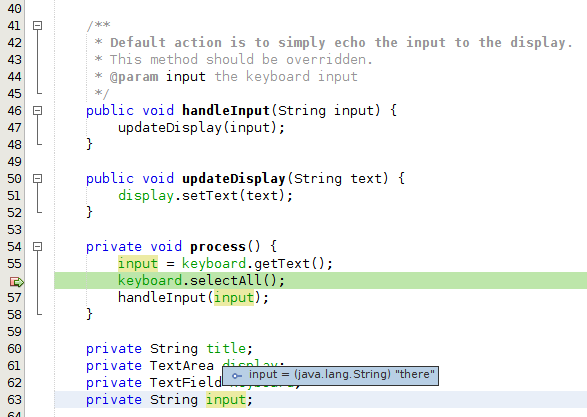
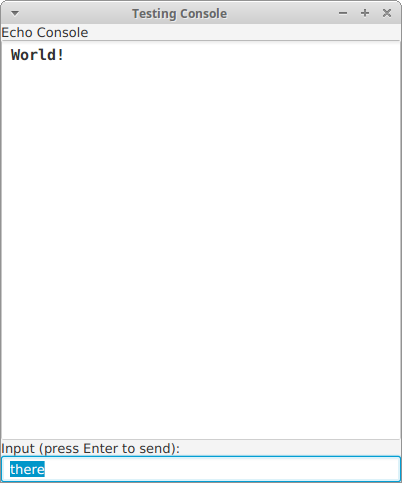
at a breakpoint  will
run the program to the next
breakpoint. In our case, this option will cause the program to
wait until the user provides another input, then it will again
pause at line 56. Here is the way the editor looks after "there"
has been entered:
will
run the program to the next
breakpoint. In our case, this option will cause the program to
wait until the user provides another input, then it will again
pause at line 56. Here is the way the editor looks after "there"
has been entered: