|
|
Previous Blackboard Items
January | February | March | April | May
Class Blackboard for January 17
 |
 This page will serve as the home base for our class this semester, which is section 001 of COMP 3220 that meets Tuesday and Thursday at 2:00 p.m. This page will serve as the home base for our class this semester, which is section 001 of COMP 3220 that meets Tuesday and Thursday at 2:00 p.m.
I will update this page for each class meeting. Items that appeared on this page from previous meetings can be found via the "<previous Blackboard items>" link at the bottom of this page.
The menu on the left will give you access to other materials related to the course.
Introductions and Roll. (Some things about me).
Syllabus and materials needed
For Thursday
- Please read Edward Tufte, Chapter 1 "Images and Quantities," pg. 13
- Obtain a Zip disk or jump drive and create a structure of folders that looks like this:
|
 |
First Project
This will be due Monday, February 13.
|
Class Blackboard for January 19
|
|
Roll
Anyone not get a copy of the syllabus the first day?
Any questions about the syllabus and materials needed?
Any Trouble moving into your disks/drives?
You should have created a structure of folders that looks like this:
Reading for Tuesday : Tufte Chapter 2, "Visual and Statistical Thinking: Displays of Evidence for Making Decisions." pg. 27
|
|
Questions about the Graphic Representation of a Process?
This will be due Monday, February 13.
|
|
Today, we'll discuss Edward Tufte's Chapter One: "Images and Quantities."
Representational Space (Ideas Site) |

Beginning Banner Techniques |
Time permitting, we'll begin our first exercise in Photoshop.
Follow the directions on the in-class handout as well as at the page "Beginning Banner Techniques."
In this exercise, you'll learn to combine typefaces and images in Photoshop to create a "banner" like the one used at the top of Web pages like this one.
|
Class Blackboard for January 24
|
|
Roll
The "previous blackboard items" link at the bottom of this page.
Reading for Thursday: Tufte Chapter 3, "Explaining Magic...," pages 55-71
Review exercises and how they apply to the first project. See the schedule.
|
|
Questions about the Graphic Representation of a Process?
This will be due Monday, February 13.
Today you'll pair up with a partner to discuss your ideas for the "Graphic...Process" assignment.
With your partner, take five minutes each considering the following questions about your respective ideas. I'll call time after five minutes to ensure that both your idea and your partner's get equal time.
- Is the topic really a process (unfolds or unfolded over time)?
- Is the process complex or "dense" enough to reward the author's and the audience's sustained attention in a project? See the assignment page about the requirement of "layers, variables, and data points." Also see page 56 of Tufte from our reading for Thursday.
- To whom would the visual explanation matter? Who is the audience?
- Would be graphic represetation of the process be more powerful as a single image (like John Snow's map) or as a sequence of images?
- What images are needed for the project? What skills?
|
|
Today, we'll discuss Edward Tufte's Chapter Two: "Visual and Statistical Thinking: Displays of Evidence for Making Decisions."
|
Beginning Banner Techniques
Intermediate Banner Techniques
Moving Files with Dreamweaver |
We'll complete the exercise "Beginning Banner Techniques" starting with Step 12, where we left off Thursday.
Then we'll do the exercise "Intermediate Banner Techniques" using the same .psd (Photoshop) file.
For these exercises, you need to have followed instructions for downloading images on the page "Banner Techniques" from the Techniques Site. These images should be saved in your "nonwww" folder.
In class, we'll upload the completed banner to your "www" folder on the Web using Dreamweaver. See the in-class handout, "Moving Files to the Web with Dreamweaver MX."
|
Class Blackboard for January 26
|
|
Roll
For Tuesday: bring in image files, plans, sketches, text, sources, etc. for the Graphic Representation of a Process so you can begin (or continue) to work on it as part of class activities.
By Friday at 2 p.m., please
complete the "Intermediate Banner Techniques" exercise, post the final product to the Web (in your folder www/exercises/banner) using the handout "Moving Files to the Web...," visit the image on the Web with a browser, and copy the complete URL into the Webx discussion "banner URLs"
If time permits, we'll do all this in class today.
Note: These items will be completed on Tuesday, January 31and will be due by Wednesday, Feb 1 at 2 p.m.
|
|
Questions about the Graphic Representation of a Process?
This will be due Monday, February 13.
|
Logging onto the Webx Discussion
|
Using the handout I give you today, log into the Webx discussion board and complete the steps for changing your Preferences. |
Tufte Chapter 3
|
Today, we'll discuss Edward Tufte's Chapter Three "Explaining Magic..." (pages 55-71) by posting a message to the Webx discussion "Tufte Chapter 3 "Explaining Magic." See the directions in the header of that discussion for specific instructions.
|
Beginning
Banner Techniques
Intermediate Banner
Techniques
Moving Files
with Dreamweaver |
We'll complete the exercises "Beginning Banner Techniques" starting with Step 12, where we left off last Thursday.
Then we'll do the exercise "Intermediate Banner Techniques" using the same .psd (Photoshop) file.
For these exercises, you need to have followed instructions for downloading images on the page "Banner Techniques" from the Techniques Site. These images should be saved in your "nonwww" folder.
In class, we'll upload the completed banner to your "www" folder on the Web using Dreamweaver. See the in-class handout, "Moving Files to the Web with Dreamweaver MX."
|
Class Blackboard for January 31
|
|
Roll
We will not have class on Thursday 2/2. This room will be available to you, however, for individual work.
For Next Tuesday 2/7 : bring in image files, plans, sketches, text, sources, etc. for the Graphic Representation of a Process so you can begin (or continue) to work on it as part of class activities.
We will complete the following today, but by Wednesday at 2 p.m., please be sure you have
- completed the "Intermediate Banner Techniques" exercise,
- posted the final product to the Web (in your folder www/exercises/banner) using the handout "Moving Files to the Web...,"
- visited the image on the Web with a browser, and
- copies the complete URL into the Webx discussion "banner URLs"
|
|
Questions about the Graphic Representation of a Process?
This will be due Monday, February 13.
Checklist
Today, I will give you an checklist for this project, which is a set of criteria that I will use in evaluating the final product. Please look over this checklist to see if it makes sense to you, and that you recognize and understand all the criteria.
On the right side of the checklist are Yes/No Criteria (either there or not). On the left side are qualitative criteria (see the key to ratings at the bottom).
|
Banner
Techniques (Optimizing)
Moving Files
with Dreamweaver
Non-Optically Acquired Images |
Banner Exercise.
We'll complete the Banner exercises by picking up with Step 12 on "Beginning Banner Techniques" using the .psd file we've been working on in the exercise "Intermediate Banner Techniques"
In class, we'll
- upload the completed banner to your "www" folder on the Web using Dreamweaver. See the in-class handout, "Moving Files to the Web with Dreamweaver MX."
- visit the banner with our Web browser to copy the URL from the location window
- paste the complete URL of the uploaded banner to the Webx discussion, "banner URLs"
"Non-Optically Acquired Images" Exercise
You'll receive an in-class handout, and will need to download an image from the technique page for the exercise on the Techniques site.
Upload the final, "optimized" product, and post the URL to the Webx discussion 'non-op."
If we complete the exercise in class, this posting will be due by Wednesday at 2 p.m.
If not, we will complete it at the beginning of class next Tuesday.
|
Class Blackboard for February 7
|
|
Roll
For Thrusday 2/9: bring in image files, plans, sketches, text, sources, etc. for the Graphic Representation of a Process so you can take advantage of our "Studio Day."
Exercises on the Web
Notice that all the handouts titles on this page are links. Clicking any of them will allow you to download the Word file from my Techniques Site.
Since this class will remain at this URL in the future, you will be able to visit the "Previous Blackboard Items" page (see the link at the bottom of the home page) and find these handouts in coming years from anywhere in the world.
For Class Today, please do the following:
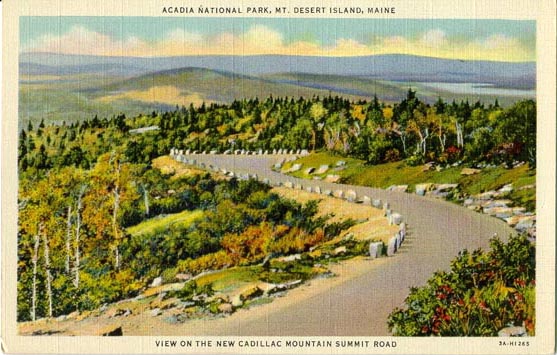
- Open up Photoshop and, in it, the open the files "non_op.psd" that we were working on last time, and the downloaded image " cadmt.jpg." Find the handout Non-Optically Acquired Graphics in Photoshop.
- Open Dreamweaver. In it, try to import your "www" site information following directions at Step 15 in the handout "Moving Files to the Web with Dreamweaver MX." This will work only if you have previously exported that site information (also described at Step 15). If necessary, you can instead recreate your "www" site in Dreamweaver by following Steps 2-10 on "Moving Files to the Web with Dreamweaver MX." Once you have, I'd recommend exporting those site settings as a ".ste" file into your "nonwww" folder (see Step 15).
- Get out the checklist for the Graphic...Process Project
|
|
Questions about the Graphic Representation of a Process?
This will be due by noon next Monday, February 13.
|
Non-Optically Acquired Images
Web-Based Documents (Dreamweaver) and Web Photo Gallery (Photoshop)
|
"Non-Optically Acquired Images" Exercise
We'll complete the exercise Non-Optically Acquired Graphics in Photoshop starting where we left off at step 9. You'll need the in-class handout from last time. Remember we also downloaded an image from the technique page for this exercise on the Techniques site.
When we have completed this exercise, upload the final, "optimized" product, and post the URL to the Webx discussion 'non-op." This will be due by Wednesday at 2 p.m.
Web-Based Documents
To learn two ways to "mount" the images we've created for the Graphic...Representation Project into Web-ready display environments, we'll do two more short exercises from the handout Web-Based Documents (Not Sites) in Dreamweaver & Web Photo Gallery with Photoshop.
You'll need to download a set of images from the index page for the folder "web_photo_gallery."
You will use one of these formats for posting your Graphic...Process Project. This will also serve as the final product of this exercise. You do not need to post these exercises or send URLs to Webx.
|
Class Blackboard for February 9
|
|
Roll
For Class Today, please do the following after you come in:
1. Open Photoshop, and then open up the first three images from "web_photo_gallery" that you downloaded last time into your "nonwww" folder (PICT0001, PICT0002, PICT0003).
2. Resize these three images each to be 600 pixels wide and save them to a folder called "webdoc" in your exercises folder. Hint: A quick way to resize images:
- With the image opened, choose Help > Resize Image
- Choose the option "Online" and click "Next"
- In the box for width, type in the number of pixels wide you want the image to be, and click "Next"
- Click "Finish"
- You will see a new, unnamed document window with the resized image. Save the new image with a new name to preserve your original.
3. Open up Dreamweaver and import your site settings (the file "www.ste") following directions in Step 15 of "Moving Files to the Web with Dreamweaver MX." If you have not previously exported the site settings and created a ".ste" file, you'll need to set up your "www" site again, following Steps 2-10 of the same handout.
|
|
Questions about the Graphic Representation of a Process?
By Monday 2/13 at noon,
- post the site to your <www/3220/process> folder
(Tip: Using Dreamweaver, just move your entire "process" folder from your disk to your "3220" folder on the Web. The new folder will simply replace the empty or old folder that's up there now).
- visit the project with your Web browser
- copy the URL from the browser, and
- go with your browser to the Webx discussion "Projects/Graphic Process URLs," paste that URL into a message and post that message by the deadline.
Printout and Commentary: On Tuesday 2/15, please bring to class a commentary and printout of your Graphic Representation of a Process Project. Please see the section "Printouts and Commentaries" on the syllabus for complete directions.
|
Web-Based Documents (Dreamweaver)
|
Web-Based Documents
Today, we'll learn to use Dreamweaver to make a basic Web page to mount images and add captions and other text. See "Alternative 1" on the handout Web-Based Documents (Not Sites) in Dreamweaver & Web Photo Gallery with Photoshop.
You'll need to have
- downloaded the set of images from "web_photo_gallery" that we used for making the "Web Photo Gallery" in Option 2 of that handout
- resized the images (see "Housekeeping and Announcements" above) and saved them in a folder called "webdoc" in your exercises folder (www/exercises/webdoc).
Since you will probably use either a basic Web page or a "Web Photo Gallery" for your Graphic...Process Project, I will not require you to post these exercises for credit.
|
|
Studio Day
We'll spend the remainder of our class today having a "Studio Session" to give you time and help working on your projects for next Monday's due date.
Though we will be working individually, I'll expect you to stay and be productive until the end of the class period. |
Class Blackboard for February 14
|
|
Roll
For Thursday, please read the entirety of Molly Bang's book Picture This: How Pictures Work. Have an idea for the "Graphic Narrative" Project, and bring in the package of 4x6 cards mentioned among the needed materials on the syllabus.
|
|
Printout and Commentary
Today, I'll collect the commentary and printout of your Graphic Representation of a Process Project. The section "Printouts and Commentaries" on the syllabus has complete directions.
|
 |
Brainstorming
We'll also look carefully at the assignment, list some ideas for stories we can tell visually, and plot them using the in-class handout "Freytag's Triangle."
As an example of the role (and varieties) of tension in a narrative, we'll look at William Stafford's poem, "Traveling Through the Dark." |
Class Blackboard for February 16
|
|
Roll
For Tuesday, bring in the idea for your Graphic Narrative Project. We will be working in class on it.
|
|
Questions?
Molly Bangs
To review the principles of visual design in Molly Bangs' Picture This, we'll do a group exercise to "compose" this graphic scene.
Ed is at home, relaxing (exposition). His peace is interrupted by a knock at the door (tension, rising action). He answers the door to find an imposing figure he doesn't at first recognize (more tension, action rising further).
How do we want to visualize the scene to create the visual sense of Ed's tension at the sight of this person at his door?
Brainstorming
We'll brainstorm an idea for the Graphic Narrative assignment using the handout "Brainstorming Session: The Graphic Narrative Project."
|
Class Blackboard for February 21
|
|
Roll
Any questions about the Graphic Narrative Project?
This assignment will be due on 4/1 (a week from tomorrow)
|
|
Backgrounds from Photos (Graphic Narrative)
\
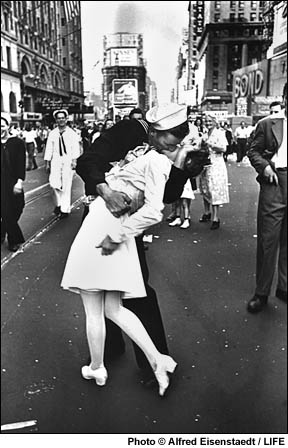
For this exercise, you'll need to download the classic Alfred Eisenstaedt photo from the celebration in Times Square at the end of World War II. Download this photo into your nonwww folder. Once we've completed this exercise:
- Save the completed Photoshop file to your nonwww folder as "background1.psd."
- Then, "Save for the Web" (as a .GIF) to a folder called "backgrounds" in your exercises folder in 3220.
- Using Dreamweaver, move the "backgrounds" folder to your folder "3220/exercises" on the Web, and send the URL to the Webx discussion "backgrounds."
OR

Try using Internet Explorer to move the folder by
- opening Internet Explorer,
- typing "ftp://www" in the location bar,
- entering your userid and password, and then
- dragging the folder to the correct place on the server.
|
|
Brainstorming Session
We'll continue the Brainstorming Session today for the Graphic Narrative Project.
|
Class Blackboard for February 23
|
|
Roll
Any questions about the Graphic Narrative Project?
This assignment will be due on 3/1 (a week from tomorrow)
For Tuesday, come prepared to work on the Graphic Narrative in class and to ask any final questions about the assignment.
|
|
Studio Session
We'll begin a studio session today for the Graphic Narrative Project. Though you are working individually, you are expected to stay and be productive until class ends at 3:15.
Remember that part of your reason for being here is also to help others. Be open to questions, and volunteer assistance where it seems needed.
|
Class Blackboard for February 28
|
|
Roll
Don't leave today without picking up your Process projects (I will pass them out at the end).
Any questions about the Graphic Narrative Project?
This assignment will be due on 3/1 (tomorrow) by noon
For Thursday, please see below:
|
|
Turning in the Graphic Narrative by Wednesday at noon
- Completely empty the folder "www/3220/narrative"
- Use Photoshop to create a Web Photo Gallery in the folder "narrative" in your "www/3220" folder.
- Move the entire "narrative" folder to the Web (to the top level of the "3220" folder)
- Visit the first page with your Web browser
- Copy the URL, and
- Paste the URL into a message to the Webx dicussion "narratives" (under "Projects").
Printout and Commentary due Thursday
As you did with the first project, you'll write a commentary and print out a copy of your project to turn in on Thursday.
To save paper, I suggest using Photoshop's automated "Contact Sheet II" to print the images of your project, four to a page.
- In Photoshop, choose File > Automate > Contact Sheet II.
- On the "Contact Sheet II" dialogue box, click the "Browse" button to navigate to the "source" folder containing the original, .psd versions of your Graphic Narrative images. Choose the folder and then "OK."
- On the dialogue box, skip down to the "Thumbnails" section, and enter 2 next to "Columns" and 2 next to "Rows." Click OK.
- Photoshop will then produce separate page-sized Photoshop documents with your images arranged four to a page. Print out these documents. You can save them in your "nonwww" folder if you wish--or not if you don't think you'll want them again.
See the "Printout and Commentary" section of the syllabus for details about writing the commentary.
Preparing for Workshop on Thursday
After the due date at noon and before class, please do the following:
- Review the workshopping page for ideas about what you might discuss in your comments.
- Visit the Graphic Narrative projects listed for the class meeting in the schedule below. Before class on workshop day, I'll link the names in this schedule to the projects, but, in the meantime, go directly to the Webx discussion "narratives" to follow the URLs there.
- Type and printout written comments and suggestions for each project scheduled for that day. Bring both the printout of your comments and the digital file to class.
Sending Your Comments (within 24 hours after)
- Within 24 hours after the workshop, copy and paste all the written comments you've made for everyone actually discussed (not just scheduled for) that day into the form "Workshop Comments for Today" and click "Send." These comments will come to me. Be sure to label each set of comments with the project number and name of the project's author.
- Individually send each author your comments on his or her project by using the e-mail list on the the form "Workshop Comments for Today."
|
|
Studio Session
We'll begin a studio session today for the Graphic Narrative Project. Though you are working individually, you are expected to stay and be productive until class ends at 3:15.
Remember that part of your reason for being here is also to help others. Be open to questions, and volunteer assistance where it seems needed.
|
Class Blackboard for March 7
|
|
Roll
On Thursday, we will not hold class. Instead, I am giving you that time to spend preparing the for the rest of the semester (including Spring Break) and perhaps to locate and decide on an image for the next assignment, the Analytical Essay (The Cultural Work of an Image).
For Tuesday, 3/21 when we return from Spring Break, please prepare comments on the scheduled Graphic Narrative Projects.
|

|
Introducing the Analytical Essay
This project will be due 3/27. |
|
Workshop
If a project is not available via a link in the schedule below, try going directly to the Webx discussion "narratives" to see if the URL is posted there.
Sending Your Comments (within 24 hours after workshop)
- Within 24 hours after the workshop, copy and paste all the written comments you've made for everyone actually discussed (not just scheduled for) that day into the form "Workshop Comments for Today" and click "Send." These comments will come to me. Be sure to label each set of comments with the project number and name of the project's author.
- Individually send each author your comments on his or her project by using the e-mail list on the the form "Workshop Comments for Today."
Resources for Workshop
|
Class Blackboard for March 21
|
|
Roll
This Thursday, Next Tuesday. Bring in all materials you'll need to work on your Analytical Essay Project, which will be due the following Tuesday, March 28, in class. These materials might include
- a copy of the image you're writing about,
- any notes or drafts you've done on this project,
- articles or URLs you've found to explain the cultural context of the image and its original presentation
- Your Tufte and Bang books
|
|
Questions about the Analytical Essay?
Again, this project is be due at the beginning of class on Tuesday, March 28 (1 week from today). |
|
Workshop
If a project is not available via a link in the schedule below, try going directly to the Webx discussion "narratives" to see if the URL is posted there.
Sending Your Comments (within 24 hours after workshop)
- Within 24 hours after the workshop, copy and paste all the written comments you've made for everyone actually discussed (not just scheduled for) that day into the form "Workshop Comments for Today" and click "Send." These comments will come to me. Be sure to label each set of comments with the project number and name of the project's author.
- Individually send each author your comments on his or her project by using the e-mail list on the the form "Workshop Comments for Today."
Resources for Workshop
|
Class Blackboard for March 23
|
|
Roll
Next Tuesday:
The Analytical Essay Project will be due at the beginning of class.
Also on Tuesday, bring your Edward Tufte book, Visual Explanations.
I will return your Graphic Narrative projects to you next Tuesday.
|

|
Introducing the ReVision Project
This assignment will be due by the day/time of our scheduled final exam period, Thursday, May 11 at 4 p.m. |
|
Questions about the Analytical Essay?
Again, this project is be due at the beginning of class on Tuesday, March 28 (1 week from today).
How Critical Paragraphs Work
Today, we'll look at the Checklist for the essay, and use it to analyze some critical paragraphs from a sample student essay about an image, "His Majesty the American Citizen."
The point of this activity is to help you see how
- facts about the context,
- ideas/quotations from secondary sources like Tufte and Bang, and
- details from your own "reading" of the image
can all work together in the same paragraph.
Cultural Encoding
Note in the first sample paragraph how the writer extends Tufte's idea of "encoding" to include various kinds of cultural symbols and "understood" objects.
If an image includes, for instance, a view of the former World Trade Center in New York, that detail is "encoded" with a whole set of assocations and meanings. It's interesting, in fact, to notice how the various television shows like The Sopranos and Sex and the City removed images of the TWC from their opening sequences after 9/11 because of the cultural encoding distracted from worlds of the shows themselves. In a sense, just as objects in images cast literal shadows to create the colors scales that Tufte talks about, , objects also cast cultural shadows that remind us of the contentional, historical and social meanings that these objects have accrued.
Practice
I will ask you to try writing or revision a paragraph for your own essay attempting to mingle, as we've seen in the sample paragraphs, context, sources, and details of your reading of the image.
|
| |
|
Class Blackboard for March 28
|
|
Roll
Analytical Essay
Today, I will pick up your Analytical Essays at the beginning of class.
ReVision Project
Any questions about the ReVision Project? This assignment will be due by the day/time of our scheduled final exam period, Thursday, May 11 at 4 p.m.
For Thursday
Please read Edward Tufte's Chapter 7, "Visual Confections." This chapter is essential reading for completing the next assignment.
Graphic Narratives
Today at the end of class, I will return your Graphic Narrative projects.
|

|
Introducing the Confection Project
This project will be due on Wednesday, April 26.
See the project's assignment page for complete details.
|
|
Selecting with Masks
See the page "Selecting with Masks" for details. I will also give you an in-class handout. You will put the final product on the Web and send the URL to the Webx discussion "Selecting with Masks" by Wednesday at 2:00. |
Class Blackboard for March 30
|
|
Roll
ReVision Project
Any questions about the ReVision Project? This assignment will be due by the day/time of our scheduled final exam period, Thursday, May 11 at 4 p.m.
Follow-Up From Today's Class
You will need to make a brief posting to a Webx discussion board as a follow-up to today's class.
Individual Conferences (Class Cancelled 4/4, 4/6, 4/11)
We will not meet as a class next Tuesday, Thursday, and the following Tuesday so we can conduct scheduled conferences.
This one, 20-minute conference, however, will count as three days' worth of attendance so please be sure to make it.
Sign up for a time slot using the discussion board by clicking one of the following links and following the directions
If you can't make any of the times, please e-mail me to make other arrangments. Be sure to sign up only for times listed on that day which have not already been reserved in posted messages.
In this conference, we'll talk about your ideas for the Confection and ReVision Projects, as well as your Essay.
Bring to Conference
- your idea for the Confection Project
- a book, article, or some written notes of your own describing the "concept" you'll be describing in your Confection Project
- your tentative plans for the ReVision Project
- any questions or issues you have with anything in the class, including Photoshop, etc.
Our next meeting together will be Thursday 4/13.
|
|
Tufte's Chapter 7: Visual Confections
We'll discuss Tufte's chapter on Visual Confections.
You will need this link to the Webx discussion Tufte C7.
Checklist for Confection
I will give you a checklist for this next project, and we'll work through the main ideas on it using examples from Tufte's book
Group Work
You'll work in groups on a sample idea for a confection based on Tufte's concept of effective presentation techniques on page 68.
|
Class Blackboard for April 13
|
|
Roll
For Tuesday. Bring in your Photoshop book and all materials you need to work on your Confection Project.
|
|
Questions on This Project?
Networking In-Class
For 10 minutes, we'll pair or "triple" up to discuss our confection project topic and the major choices involved:
- Having a substantial, useful, fully developed conceptual model as a topic, rather than an informally defined idea or mood that would inform a collage. (For an example of what I mean by "conceptual model" see this except from the book House Thinking by Winifred Gallagher, in which she presents a a theory about what makes certain houses and rooms inviting and appealing to us.)
- Deciding strategically among layout options: of an imagined scene, compartments, or a hybrid
- Using the background as an analogy or metaphor to suggest the nature of the concept and the dynamic relations of its component parts
- Develping each part of the concept as an elaborated idea in itself, rather than just a label or icon that appears in a visual list.
|
|
Creating Complex Imagined Scenes and Compartments for the Confection Project
See the in-class handout and the accompanying page from the Techniques Site.
Once we have completed this image, "Save for the Web" as a jpeg in a folder "www/3220/exercises/complex" on the Web.
Send the working URL to the Webx discussion "Complex Scenes" |
Class Blackboard for April 18
|
|
Roll
For Tuesday. Bring in your Photoshop book and all materials you need to work on your Confection Project.
|
|
Conceptual Mapping (The Confection Idea)
The whole idea of the Confection is to visualize the nature or relationships among a rich set of ideas.
As you work on this project, though, it's a good idea to have a clear notion of what ideas your visualizing.
Let's make a "Conceptual Map" of your Confection Project topic. This process will help you to understand better just what ideas you're visualizing, and to see more deeply the relationships among those ideas.
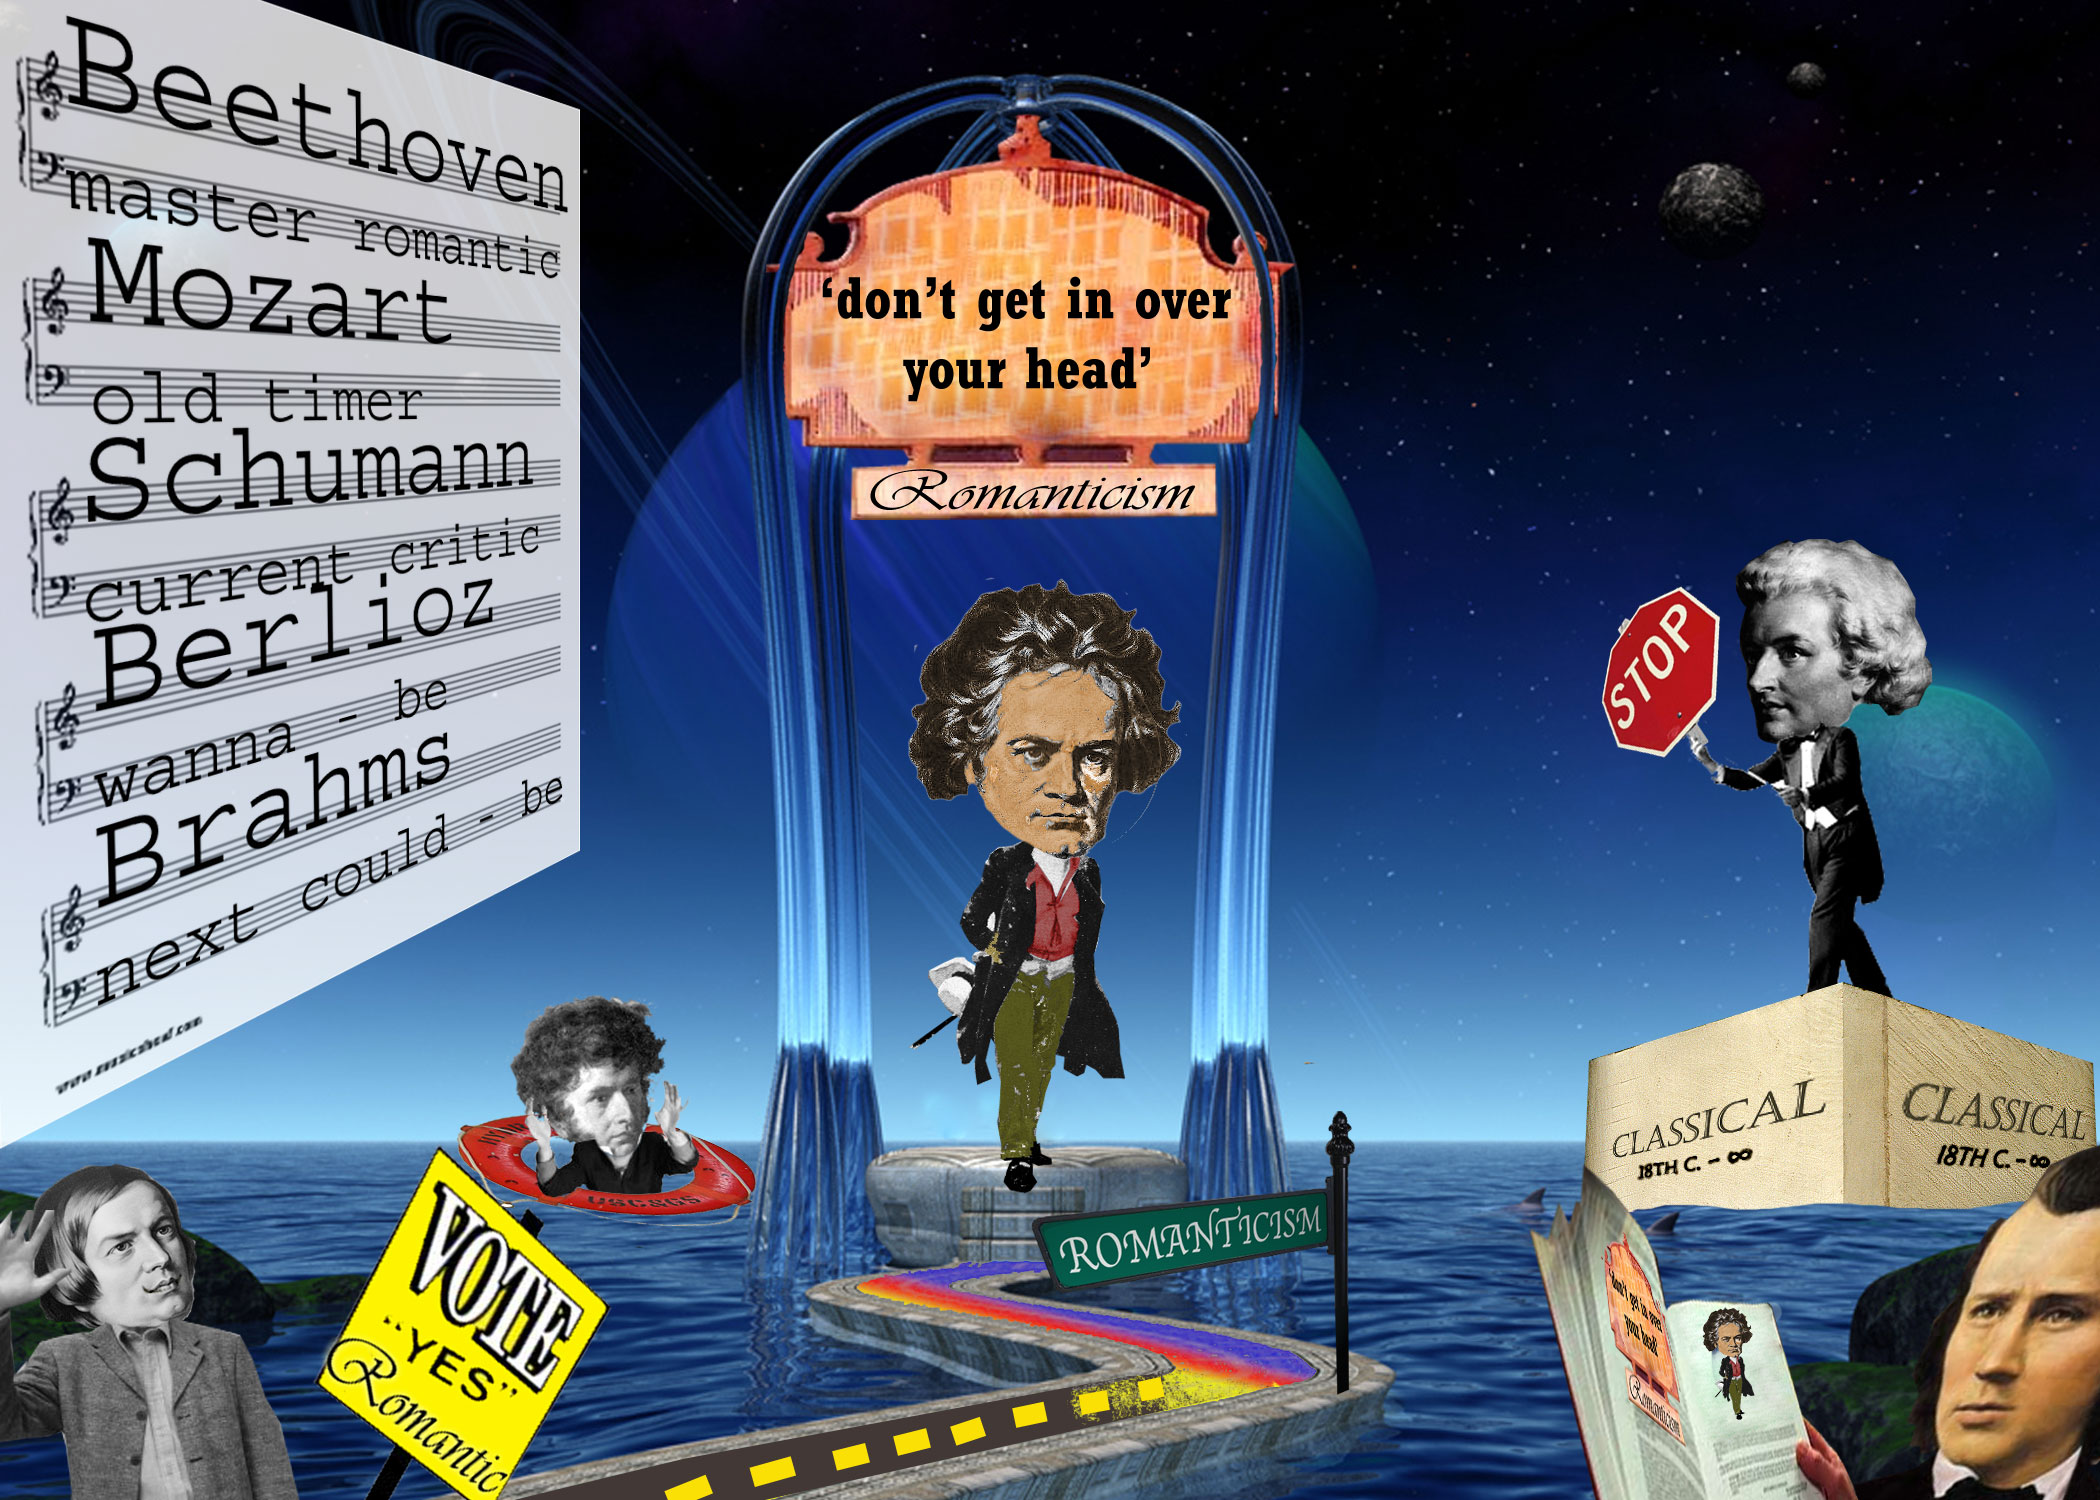
First, let's try this together using the Romanticism confection sample.
STEPS:
1. On a blank piece of paper, make a abstract diagram of the basic set of ideas that make up your confection. (Do not make a diagram of the parts of your background image or their arrangement). For example,
- five causes of an event (the event in the middle)
- six varieties of something (each variety spaced around on the page)
- seven possible effects of a cause (the cause in the middle), etc.
Make a little circle around each one.
2. Draw lines, arrows, boxes, etc. that express the basic relationships among these component ideas. For example:
- for causes of an event, have arrows converging on the event in the middle
- for effects of a cause, have arrows radiating out from the center
- for a sequence of events, have arrows that lead from first to second to third, etc.
- for varieties of something, draw a box around the entire diagram and label the border of the box with what that "something" is.
3. Break down and elaborate the big ideas here into smaller, component parts. Write small words and phrases near the major ideas, circles and boxes in your diagram and connect them with small lines. Try drawing in ideas from your original source (an article, book, album, etc.) For instance:
- looking at one of the causes of an event, what are the causes of that cause? What are the details and dynamics that make that particular cause what it is?
4. Expand, Associate, Interpret. As you break down and elaborate the bigger ideas into component ideas, also write down any other thoughts, associations and interpretations that you're having. These may be ideas or nuances that you'll want to suggest visually in the Confection.
5. Look again at your Confection Project (plan, or draft), and think about ways that you can design into it fuller, more complete, more vivid visualizations of the ideas you've just mapped.
|
|
Create Your Own 1
Today, I will ask you to pick a tool or technique from the Photoshop book to present to the class as an exercise.
1. Look through the Photoshop book to find a technique or tool. If you don't have access to your book, use Photoshop's Help screens or one of the Web sites below.
2. Try the technique out in Photoshop using a photo of your own (or one you downloaded).
3. Save your completed trial of the technique to a folder (www/3220/exercises/photoshop1) as "finished" (either .jpg or .gif)
4. Save the original image you started with to the same folder under its original name.
5. Come up with a descriptive or catchy title for the technique, and send a message to the Webx discussion photoshop techniques 1 with:
a. your title in the first line,
b. the page number or URL for the tutorial on the second line. and
c. a link to your completed, trial image
d. a link to the original image.
|
Class Blackboard for April 20
|
|
Roll
For Tuesday. Bring in your Photoshop book and all materials you need to work on your Confection Project.
The Confection Project will be due to be posted on next Wednesday, 4/26 by noon. You will also send the URL of the Web-ready-image format (.jpg) to the Webx discussion board by that day and time.
|
|
The Vision in ReVision (2 Postings)
1. In the Webx discussion "Vision in ReVision," write a paragraph where you explain
- how your ReVision will be different from the original project, and
- how this difference helps to explain the key distinction between a "local" revision and a "global" reVision.
If you don't know whether your plan is just a local set of fixes or constitutes a new "vision," try just writing why you're not sure, and asking yourself quesitons.
2. Read over the other postings to this prompt. Reply to one.
- If the writer of the message is struggling to define his/her new vision, offer suggestions or point to other examples and explain why they may help.
- If the writer seems to have a good plan for a ReVision, say why you think so, and point to other examples to help establish the more general principles of a "global ReVision."
|
|
Create Your Own 1 (follow-up)
Revisit the Webx discussion photoshop techniques 1 and look over the techniques, including the before and after examples.
Choose one that you think is most relevant specifically to the Confection Project, and "vote" for it by clicking the "reply" link in that message's header, and sending a blank reply message.
|
|
Create Your Own 2
Today, pick another tool or technique from the Photoshop book to present to the class as an exercise.
1. Again, look through the Photoshop book to find a technique or tool. If you don't have access to your book, use Photoshop's Help screens or one of the Web sites below.
2. Try the technique out in Photoshop using a photo of your own (or one you downloaded).
3. Save your completed trial of the technique to a folder (www/3220/exercises/photoshop2) as "finished" (either .jpg or .gif)
4. Save the original image you started with to the same folder under its original name.
5. Come up with a descriptive or catchy title for the technique, and send a message to the Webx discussion photoshop techniques 2 with:
a. your title in the first line,
b. the page number or URL for the tutorial on the second line. and
c. a link to your completed, trial image
d. a link to the original image.
|
|
Confection Work
If you have time remaining, work on your Confection Project, which will be due next Wednesday, 4/26 by noon. |
Class Blackboard for April 25
|
|
Roll
The Confection Project will be due to be posted on tomorrow, Wednesday 4/26, by noon. You will also send the URL of the Web-ready-image format (.jpg) to the Webx discussion "confections" by that day and time.
|
|
Turning in the Confection by Wednesday at noon
- Save your confection image as a .jpg to a folder called "confection" inside of the "3220" folder.
- Move the entire "confection" folder to the Web (to the top level of the "3220" folder)
- Visit the first image with your Web browser
- Copy the URL, and
- Paste the URL into a message to the Webx dicussion "confections" (under "Projects").
- On a line of the message below the URL, explain in a brief paragraph the concept that your Confection illustrates to help your classmates understand what they're seeing. (Feel free to copy portions of your commentary for this.)
Printout and Commentary due Thursday
Write a commentary and print out a copy of your project to turn in on Thursday at the beginning of class.
See the "Printout and Commentary" section of the syllabus for details about writing the commentary.
Preparing for Workshop on Thursday
After the due date at noon and before class, please do the following:
- Review the workshopping page for ideas about what you might discuss in your comments.
- Visit the Graphic Narrative projects listed for the class meeting in the schedule below. Before class on workshop day, I'll link the names in this schedule to the projects, but, in the meantime, go directly to the Webx discussion "confections " to follow the URLs there.
- Type and printout written comments and suggestions for each project scheduled for that day. Bring both the printout of your comments and the digital file to class.
| Thursday, April 27 |
Tuesday, May 2 |
Thursday, May 4 |
|
1. Simon
2. Stephanie
3. Anna
4. Jackie
5. Tim
|
6. Nicole
7. Rick
8. Shannon
9. Emily
10. Katy
|
11. Mark
12. Lindsey
13. Marisa
14. Julie
15. Nat
16. Michael
|
Sending Your Comments (within 24 hours after)
- Within 24 hours after the workshop, copy and paste all the written comments you've made for everyone actually discussed (not just scheduled for) that day into the form "Workshop Comments for Today" and click "Send." These comments will come to me. Be sure to label each set of comments with the project number and name of the project's author.
- Individually send each author your comments on his or her project by using the e-mail list on the the form "Workshop Comments for Today."
Confection Studio Day Today
Today, we will work on our Confection Projects in class. Though you will be working individually, please plan to spend the entire class period preparing your work for tomorrow's deadline.
If you have questions, please ask them of your neighbors or of me. If you can help those near you, please take the time to do so if you are able.
|
Class Blackboard for April 27
|
|
Roll
Printout and Commentary for the Confection
I will collect your printout and commentary today at the beginning of class. ee the "Printout and Commentary" section of the syllabus for details
|
|
Workshop
The submitted URLs and concept summaries for all the Confection Projects appear in the Webx discussion confections.
Sending Your Comments (within 24 hours after)
- Within 24 hours after the workshop, copy and paste all the written comments you've made for everyone actually discussed (not just scheduled for) that day into the form "Workshop Comments for Today" and click "Send." These comments will come to me. Be sure to label each set of comments with the project number and name of the project's author.
- Individually send each author your comments on his or her project by using the e-mail list on the the form "Workshop Comments for Today."
|
Class Blackboard for May 2
|
|
Roll
Course Evaluations
Workshop Thursday. On the last day of classes, we will complete our workshop according to the schedule below.
|
|
Workshop
The submitted URLs and concept summaries for all the Confection Projects appear in the Webx discussion confections.
Sending Your Comments (within 24 hours after)
- Within 24 hours after the workshop, copy and paste all the written comments you've made for everyone actually discussed (not just scheduled for) that day into the form "Workshop Comments for Today" and click "Send." These comments will come to me. Be sure to label each set of comments with the project number and name of the project's author.
- Individually send each author your comments on his or her project by using the e-mail list on the the form "Workshop Comments for Today."
Workshop Resources
|
|
