
Effective Lighting Design A to Z
by Mark Harvey

A. Read the play. Imagine yourself the director, the producer and all of the designers. Consider how you'd like to see all aspects of the play produced and bring those ideas to meetings you have with other artistic personnel.

B. Meet with the director. Find out how the director wants to approach the production. Compare notes and see if can interest the director with your ideas for the show.
C. Meet with the production team. Decide how often the group will get together. Help develop a master calendar and determine deadlines for the group. Collaborate towards a final product that all agree is the best possible approach for this play, at this time, in this venue, for this audience.
D. Write your ideas down. Create a written approach to the design that you can give to the director for feedback. Explain what you feel the play is about and how you'd like the lighting to contribute. Begin developing a lighting and color key that will indicate the direction and color of light for a typical lighting area on stage. Begin developing a cue synopsis. Be as specific as possible, but realize the written analysis is a work in progress and the approach will be modified as the process continues.
E. Illustrate your ideas. Use storyboards, photos, period paintings, computer software or a light lab to demonstrate to the director and design team what you want to accomplish with the lighting design.
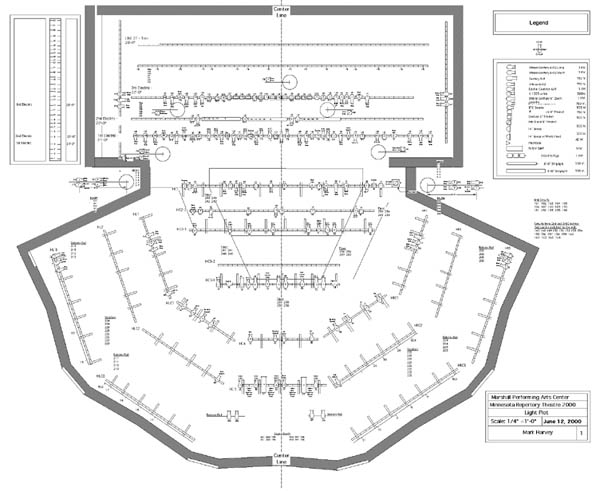
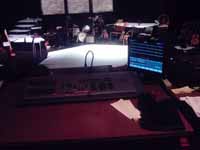
F. Get the facts. Get an accurate copy of the ground plan and vertical section of the theatre where the show will be produced that indicates all hanging positions and circuit locations. Eventually, you'll also need a ground plan and vertical section of the scenic design.
![]()
Marshall Performing Arts Center
G. Find out what you've got to work with. Luminaries for your production are like the paint and brushes of an easel artist. Learn the vital statistics of the equipment available, including quantity, lamp type, wattage, frame size and multiplication factor.
Marshall Center Lighting Inventory
H. Determine a lighting key. Decide what functions
of light you want to use for the entire stage. Make a simple diagram
that can be shared with the director and design team.
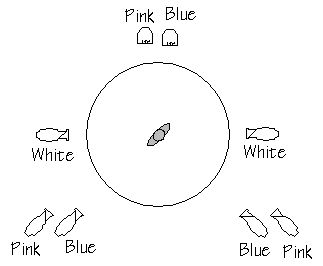
I. Decide on color. Use a light lab to experiment with different colors on costume swatches, scenic models or paint chips for the show.

J. Begin watching rehearsals. Once blocking is completed, a lighting designer should become familiar how the director uses the stage space. Complete run-throughs can be the most helpful, but attend enough rehearsals to be familiar with the actor's blocking. Make 8"x10" copies of the ground plan and diagram blocking for individual scenes if necessary.
K. Determine lighting areas. The size and number of lighting areas you'll need to light the acting space will depend on the space you're working in and the number and type of instruments you have. Remember that acting areas are at face level rather than floor level. Draft a vertical section of the theatre space that determines the distance of the lighting at the particular angles you want to use. Use the multiplication factor of each type of instrument to determine the approximate size of the pool of light for specific distances.
L. Determine the number of lighting instruments you need. Multiplying the number of functions by the number of lighting areas will give you a base number of how many lighting instruments you'll need. Add to this total any specials you intend to use, accent lighting, washes, and practicals.
M. Commit your inventory. Determine which lighting instruments would best serve each lighting function. Commit one instrument for each function for each lighting area. Try to avoid mixing and matching instruments as much as possible. Be sure to include those lighting instruments you want to use for specials, accents and washes.
N. Group instruments into dimmers. Find out how many dimmers are available and the wattage of each dimmer. If you have more lighting instruments than dimmers, grouping instruments into dimmers will be required. While grouping the lights according to lighting area is feasible, it is more common to group like functions of adjacent areas together into the same dimmer. Repatching dimmers is also an option, but only if well planned. It's feasible, for example, to repatch a dimmer used for a special that is needed only in Act I to a special that's needed in Act II.
O. Draft a light plot. This is your communication tool with your electrics crew, so meet with the master electrician and determine scale, terminology and information that will be required for the hang. Use the USITT graphic standards as closely as possible for clarity.
P. Create a database. Channel schedules, dimmer schedules, instrument schedules, re-patch charts and gel cut lists can be generated on computer software that will allow you to sort your data in a variety of ways to make organization easier. Information on the database should include type of instrument, channel, dimmer, circuit, instrument number, location, wattage, lamp type, gel frame size, gel color, and accessories needed.
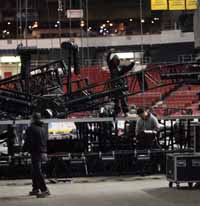
Stage hands erect the lighting and sound stage for the Elton John concert at the Dunkin' Donuts Center in Providence, part of the musician's 60th birthday celebration.
Journal photo / Mary Murphy
Q. Focus. Once the lighting crew has hung, circuited and patched the light plot, you should be ready to focus. Spike the lighting areas on the stage deck if necessary. Focus each instrument individually.
R. Preprogram the light board. If you're working with a computerized lighting console, preprogram channels, submasters, focus points, effects, and groups to accommodate the development of each cue during tech week more efficiently.

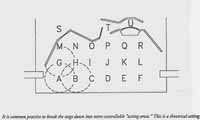
S. Make a magic sheet. Using a ground plan of the scenic design, indicate the location, direction, and color for each channel and group used in the production. This document can speed up the time needed for writing cues. If there are scene shifts during the play, make a new magic sheet for each scenic arrangement.
T. Plan tech week. Meet with the technical director, stage manager and design team to determine specifically what needs to be accomplished during each session of tech week and how much time should be devoted to each task.
U. Book cues. Meet with the director and stage manager to discuss cues in the script. This is often called a paper tech. Give the stage manager at least one rehearsal with lighting cues in their book so they can envision calling the show.
V. Set levels. Give yourself time to program cues without the cast. Plan about an hour for every ten cues that need to be programmed. Invite the director to sit in to give you feedback. This is sometimes called a dry tech, though dry tech often includes other tech elements as well. Be sure to plan enough time to have the stage for programming light levels for all cues.
Victory Gardens Theatre
Chicago, Illinois
W. Be supportive. Give positive feedback to the stage manager and lighting crew during technical and dress rehearsals. Think about ways you can make the learning curve easier for them so they can execute your show as accurately as possible as soon as possible. Provide individualized paperwork if that will help the crew learn their tasks quicker. Take the time to teach anyone who has no prior experience how they can help execute your design.
X. Take notes. Classify notes as either program notes that can be fixed with programming changes in levels, cues or times, or focus notes that will require the help of the lighting crew to fix. Meet with the director and other designers after each dress rehearsal to discuss how problems will be addressed.
Y. Enjoy the run. Give credit to those who have collaborated with you, and appreciate your own contribution to the production.
Z. Document your work. Keep all visual aids you used to convey your design to others. Attend the photo call and take pictures. If there is no photo call, arrange to take pictures during a dress rehearsal. Store the documentation of the process and final product of your design in a design portfolio to keep it neat and in good condition.