Creating a Web Page Using DreamWeaver
Using Photos to your Web Page as a Background
1. Follow the same directions to Open a photo in PhotoShop.
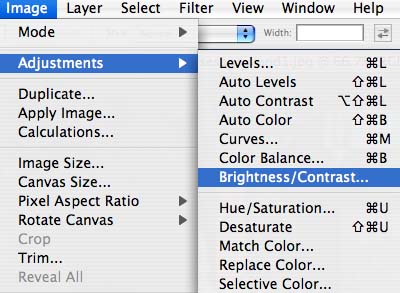
2. Once the photo is Open, go to the PhotoShop Toolbar and Click on "Image", Drag down to "Adjustments", then over and down to "Brightness/Contrast..." and release.
3. The Brightness/Contrast Control Box will open:
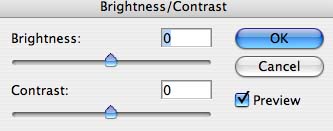
4. Click the Preview Box, and increase the Brightness to an acceptable level. (For photos to work as backgrounds on web pages, they need to be overexposed so words superimposed over the photo can be legible.)
5. Click "OK"
6. In the PhotoShop Toolbar, Click on "Image", drag down to "Image Size" and release.
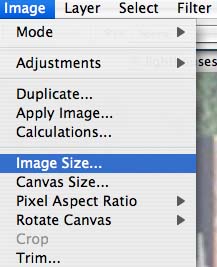
7. The following Dialog Box will open:
![]()
8. For a single image to completely cover a web page, it needs to be 1100 - 1500 pixels wide, and 800 - 1000 pixels high. Different browsers will space things a little differently, so you'll have to experiment.
9. After you've adjusted the Width and Height of the Image, Click OK. If you want to adjust Width and Height independently, uncheck the "Constrain Proportions" box.
10. The next step is to Save the image in your ~[yourusername] folder.
11. In the PhotoShop Toolbar, Click on "File" and drag down to "Save As"

12. The following dialog box will open.
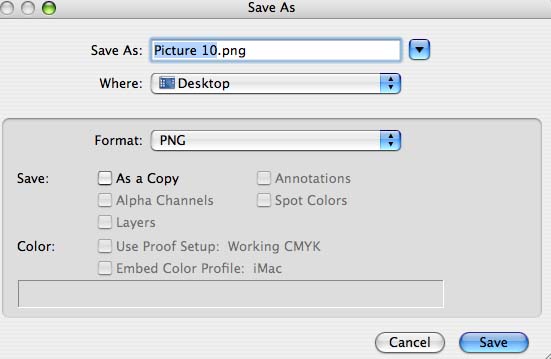
13. Type in the name of the file the way you want it saved.
14. In the "Where:" Box, choose your ~[yourusername] folder.
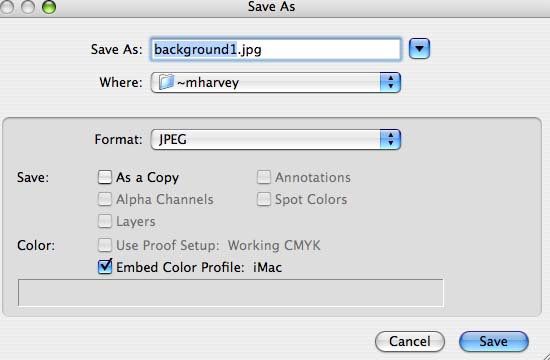
15. In the "Format:" Box, choose JPEG, and Click "Save".
16. A dialog box will open asking how large a file you want the image to be. For web pages, file sizes of 5 or 6 work well. Large files take too long to download.
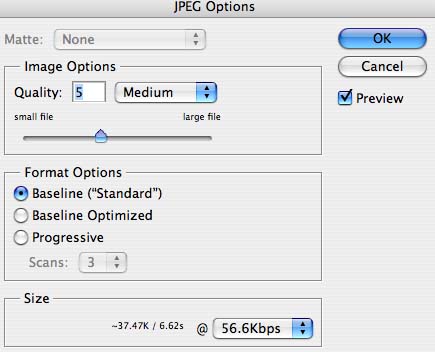
17. After you've chosen the level of quality you want, Click OK.
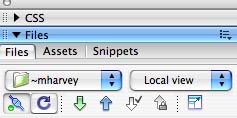
18. Back in DreamWeaver, Click the "Circle Arrow" in the Files palette to refresh your list of files. Your photo file should appear.
19. In the DreamWeaver Toolbar, Click "Modify and drag down to "Page Properties" and release.
20. Click "Appearance" under Category, then "Browse".
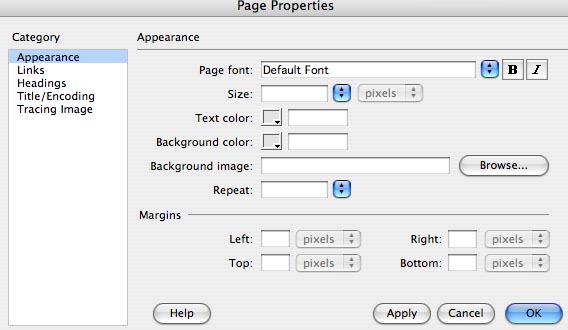
21. Go to your ~[yourusername] folder to find the image you want to use for a background, Click "Choose".
22. File name will appear in box nest to "Background Image:"
23. Click "OK."